What Does This Feature Do?
As an agency, you often have a list of potential clients — local businesses, leads from a directory, or prospects from an event. The fastest way to win them over is to show, not tell: send each prospect a personalized website demo along with a professional outreach email. Outreach Campaign lets you do exactly that at scale:- Bring in a spreadsheet of your prospects (
.csvor.xlsx) - Auto-generate a tailored website for every single one
- Set up personalized cold emails with each prospect’s website link and send through Instantly
Before You Start
Step 1: Prepare Your Prospect File
You can prepare the file in Excel or Google Sheets, then save it as.csv or .xlsx.
Fill in the header row
email column. You can add other columns as needed, for example:| business name | description | phone (optional) | address (optional) | |
|---|---|---|---|---|
| Baker Shop | Handmade baking for 10 years | zhang@example.com | 13800001111 | No.1 Happy Road |
| Flower Store | Fresh flower delivery | li@example.com | 13800002222 | No.2 Sunny Road |
Fill in the data (starting from row 2)
Optional Preparation: Set Up Your Instantly Account
If you want to complete the whole campaign in one pass, prepare your Instantly.ai account in advance so you’re ready when Readdy reaches the Instantly step inside Email Setting.Register an Instantly account
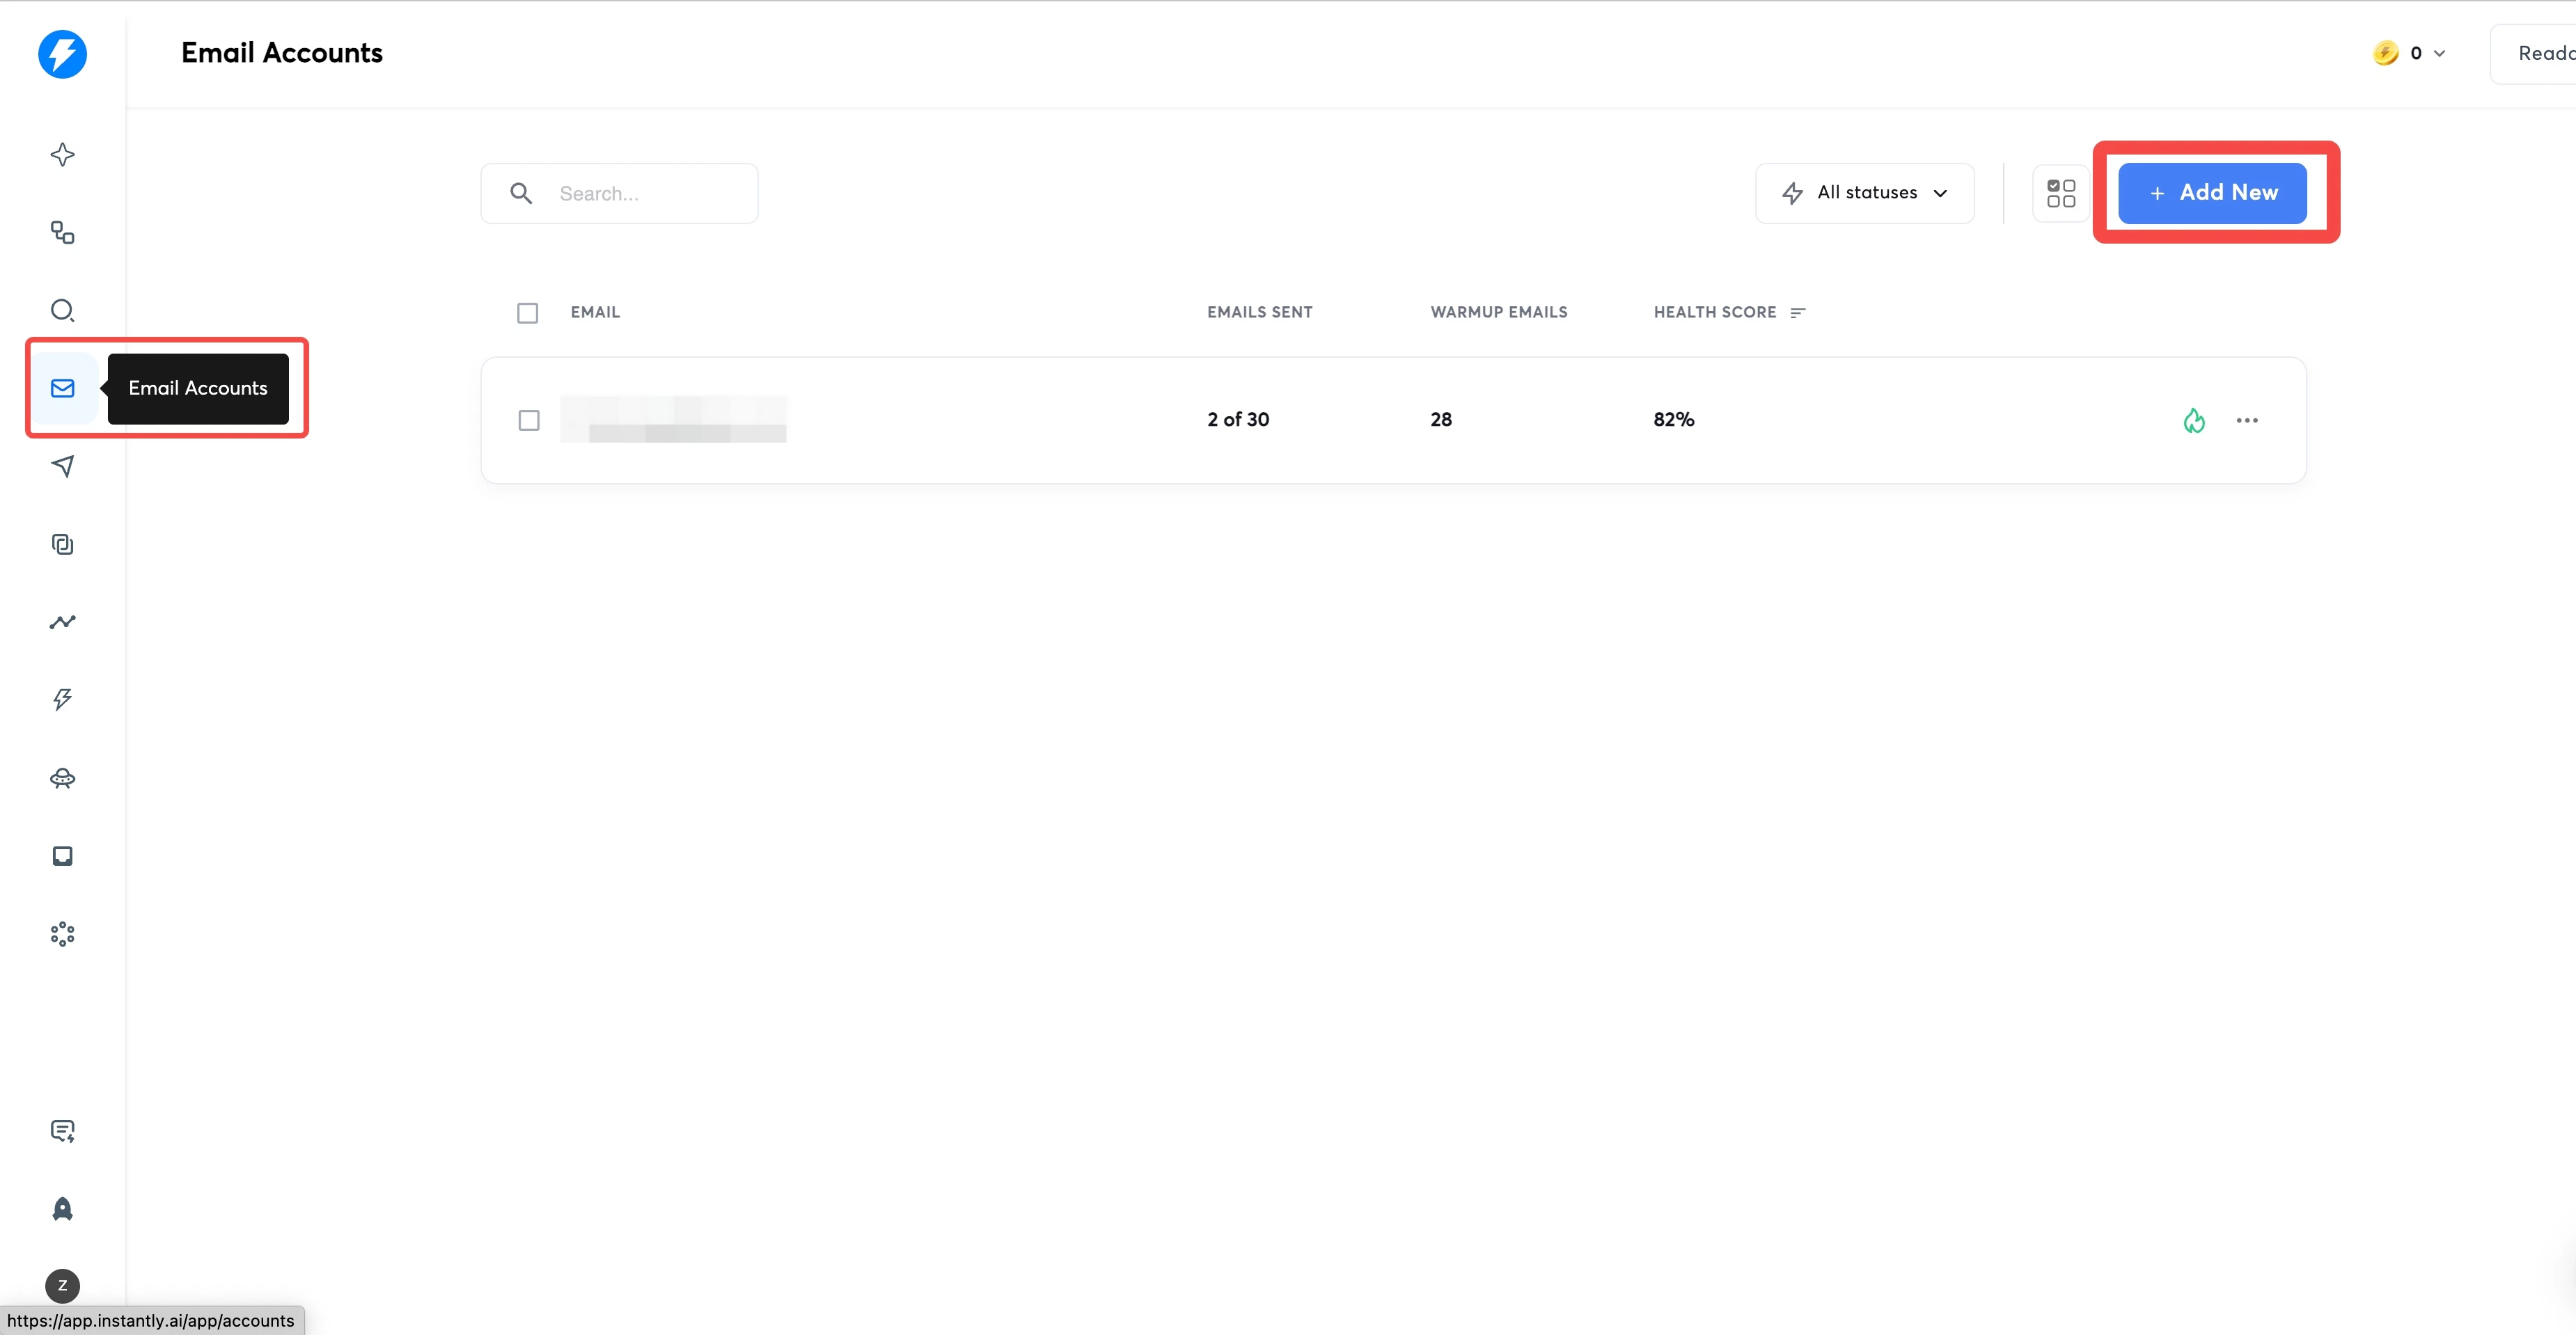
Add an email account
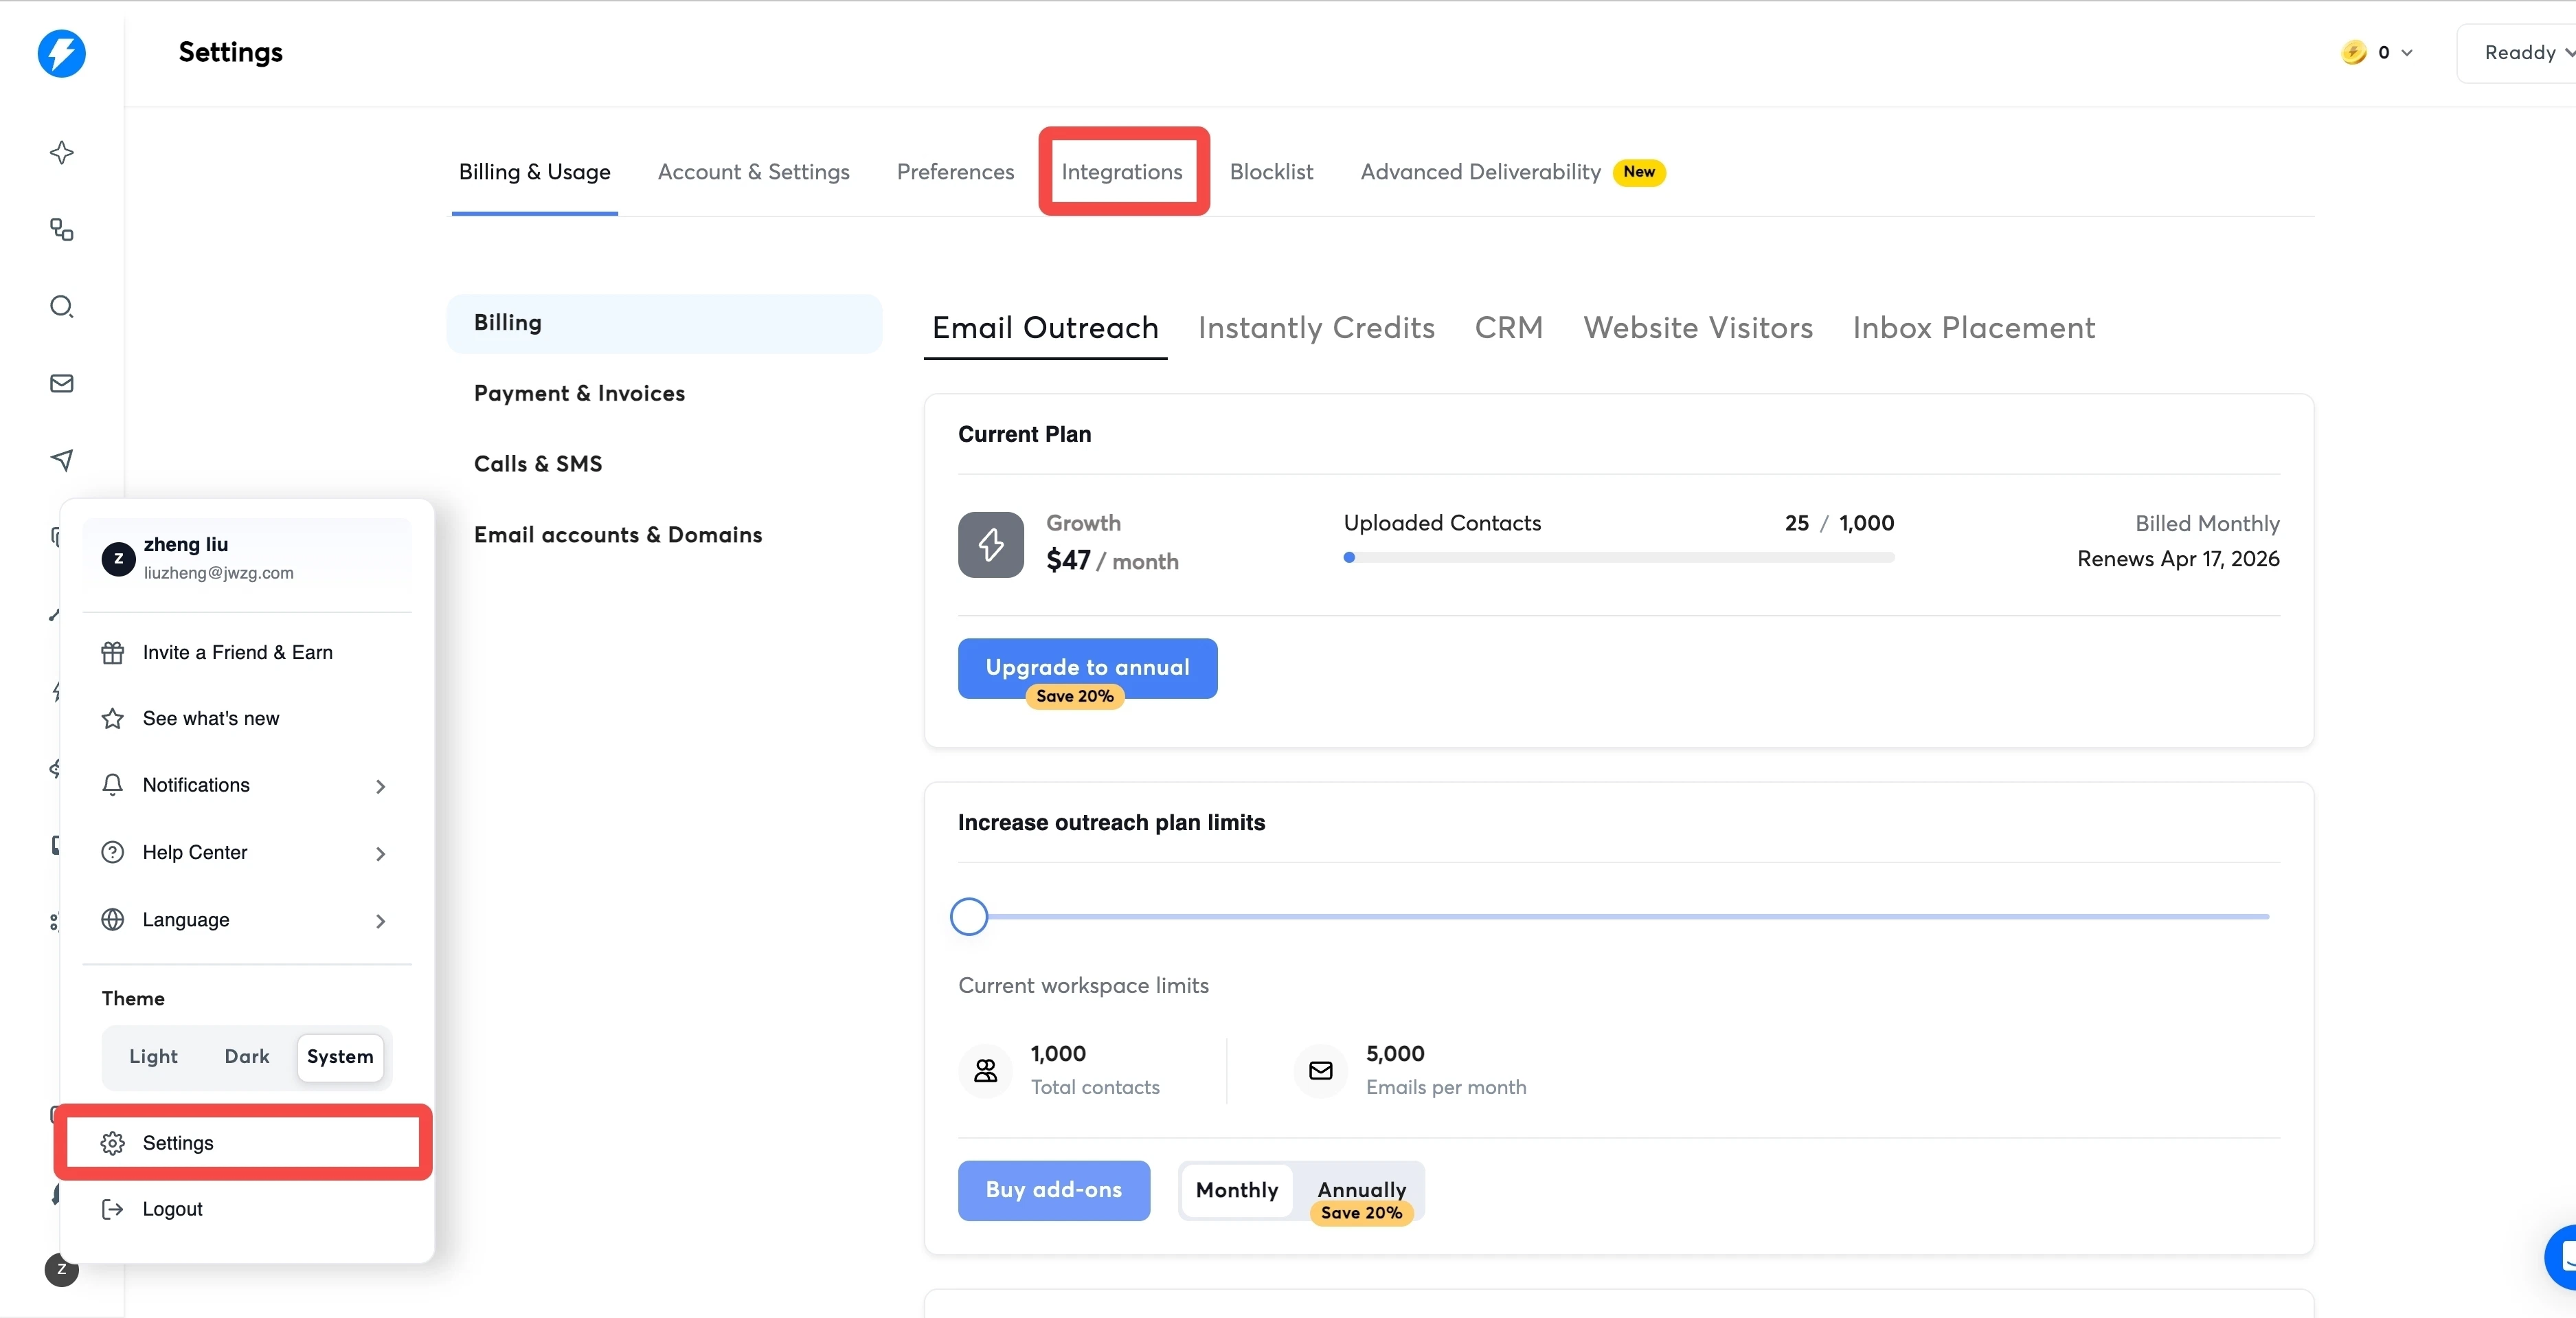
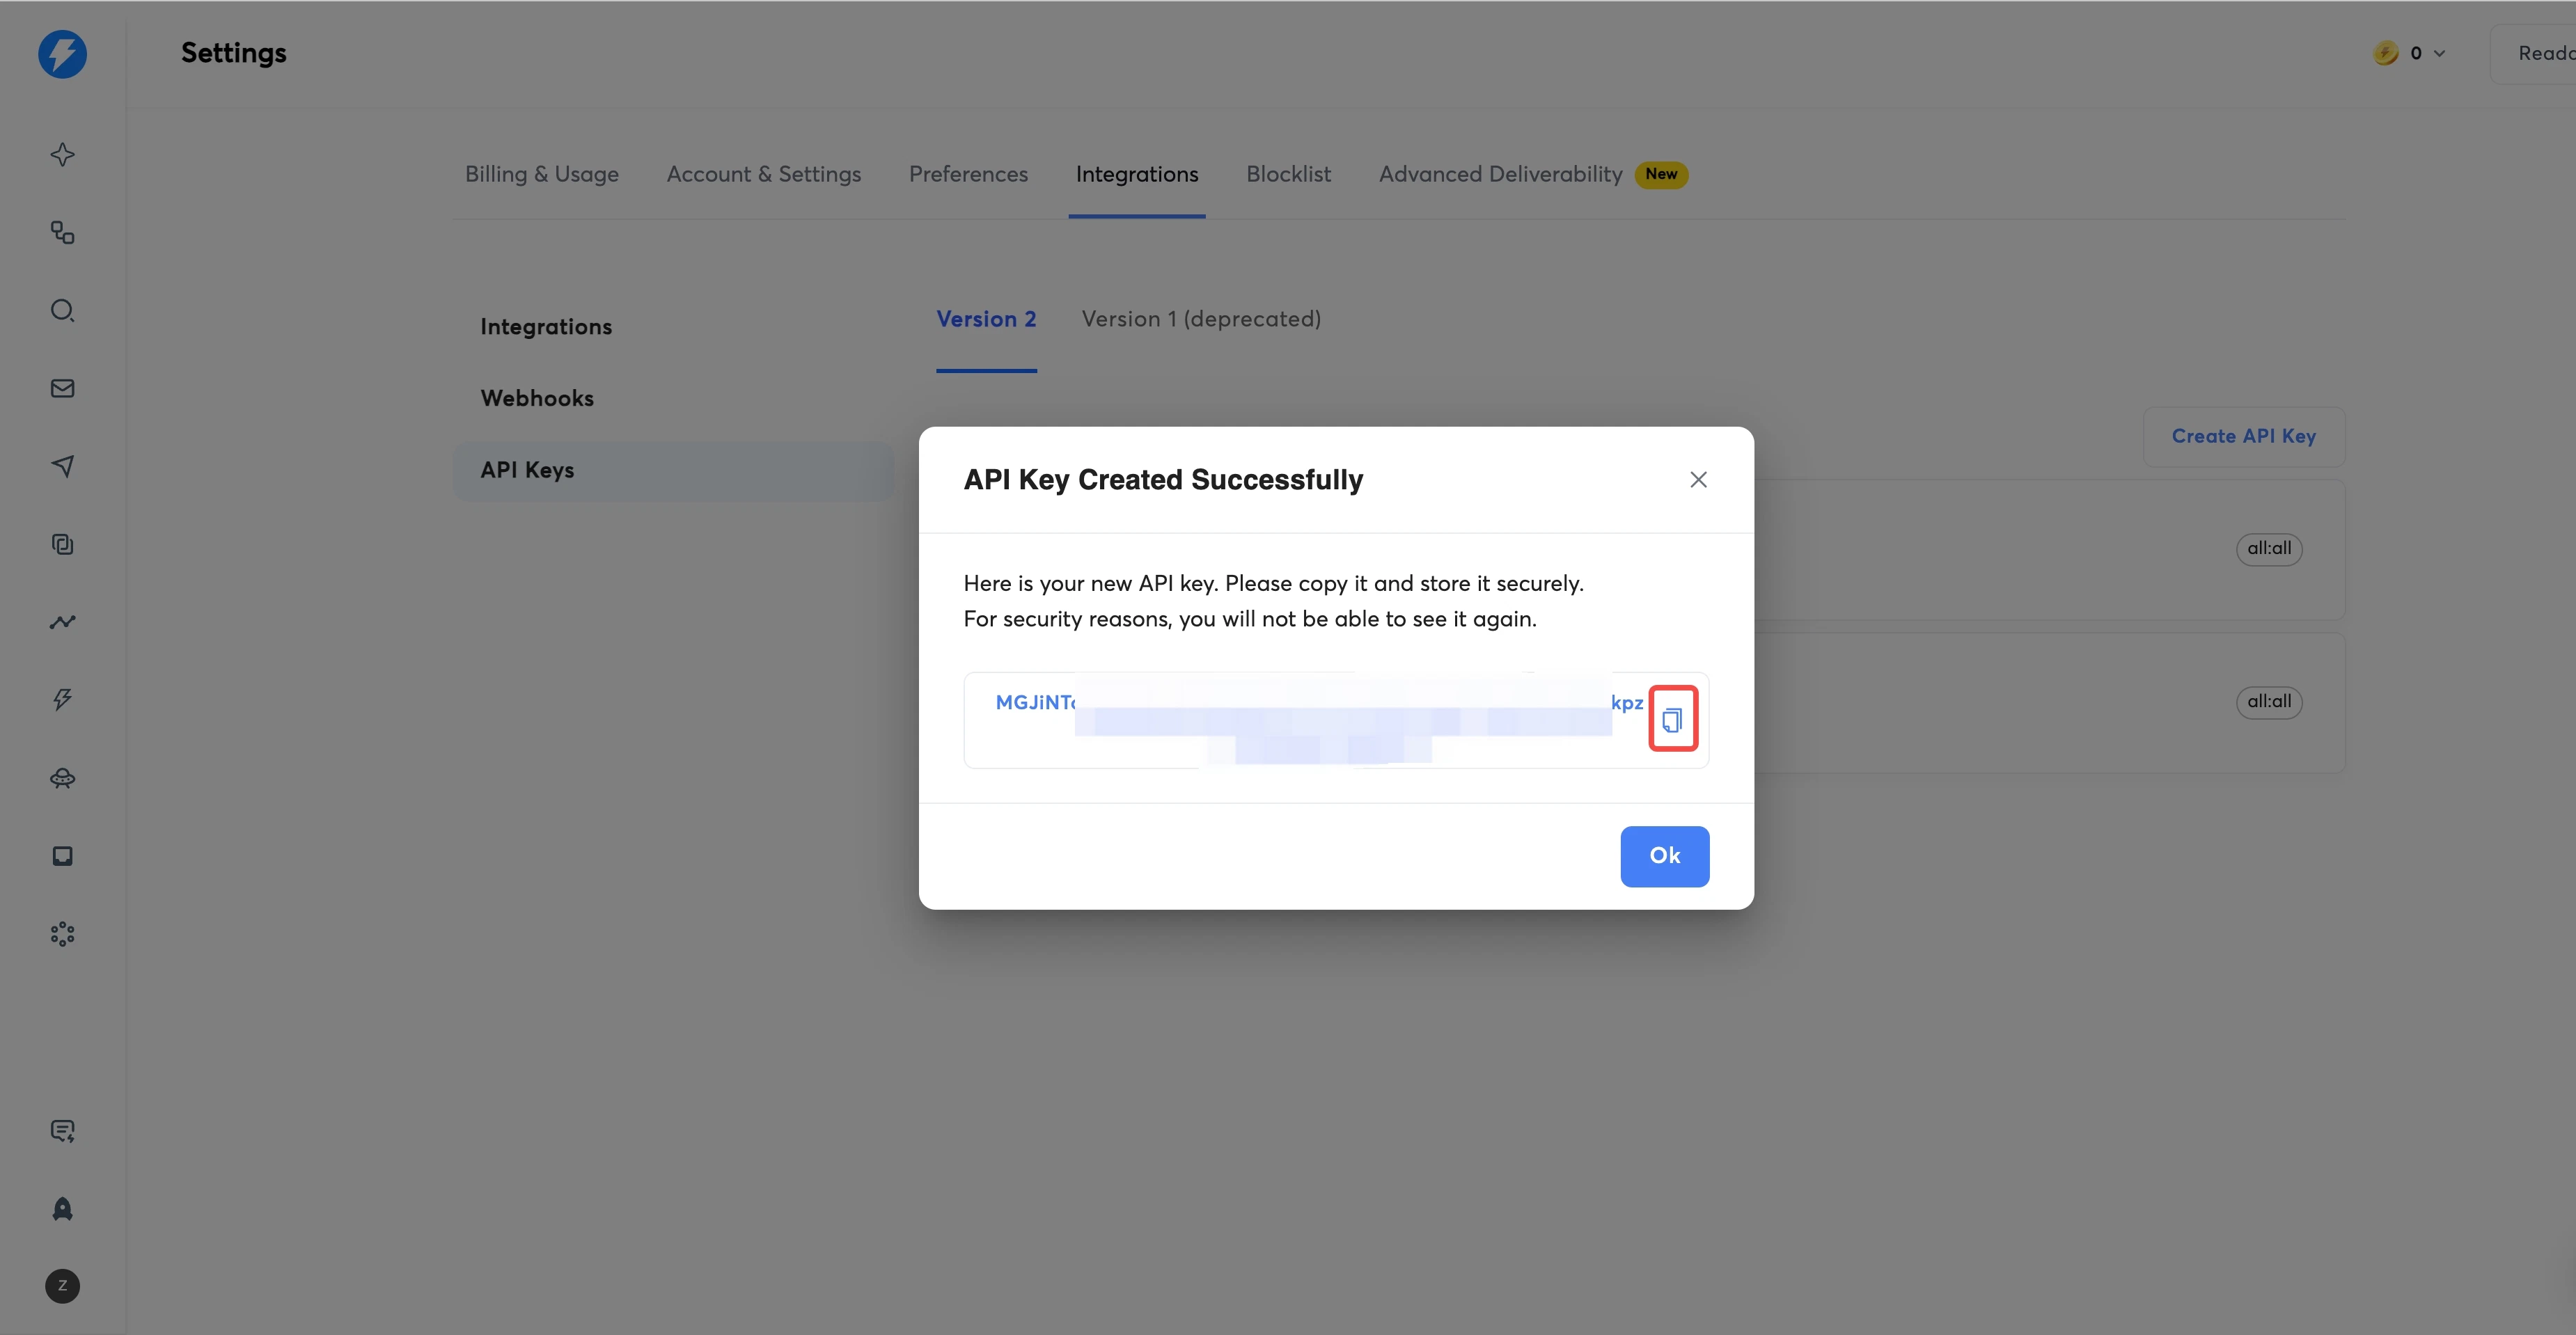
Go to Settings > Integrations > API

Campaign Flow
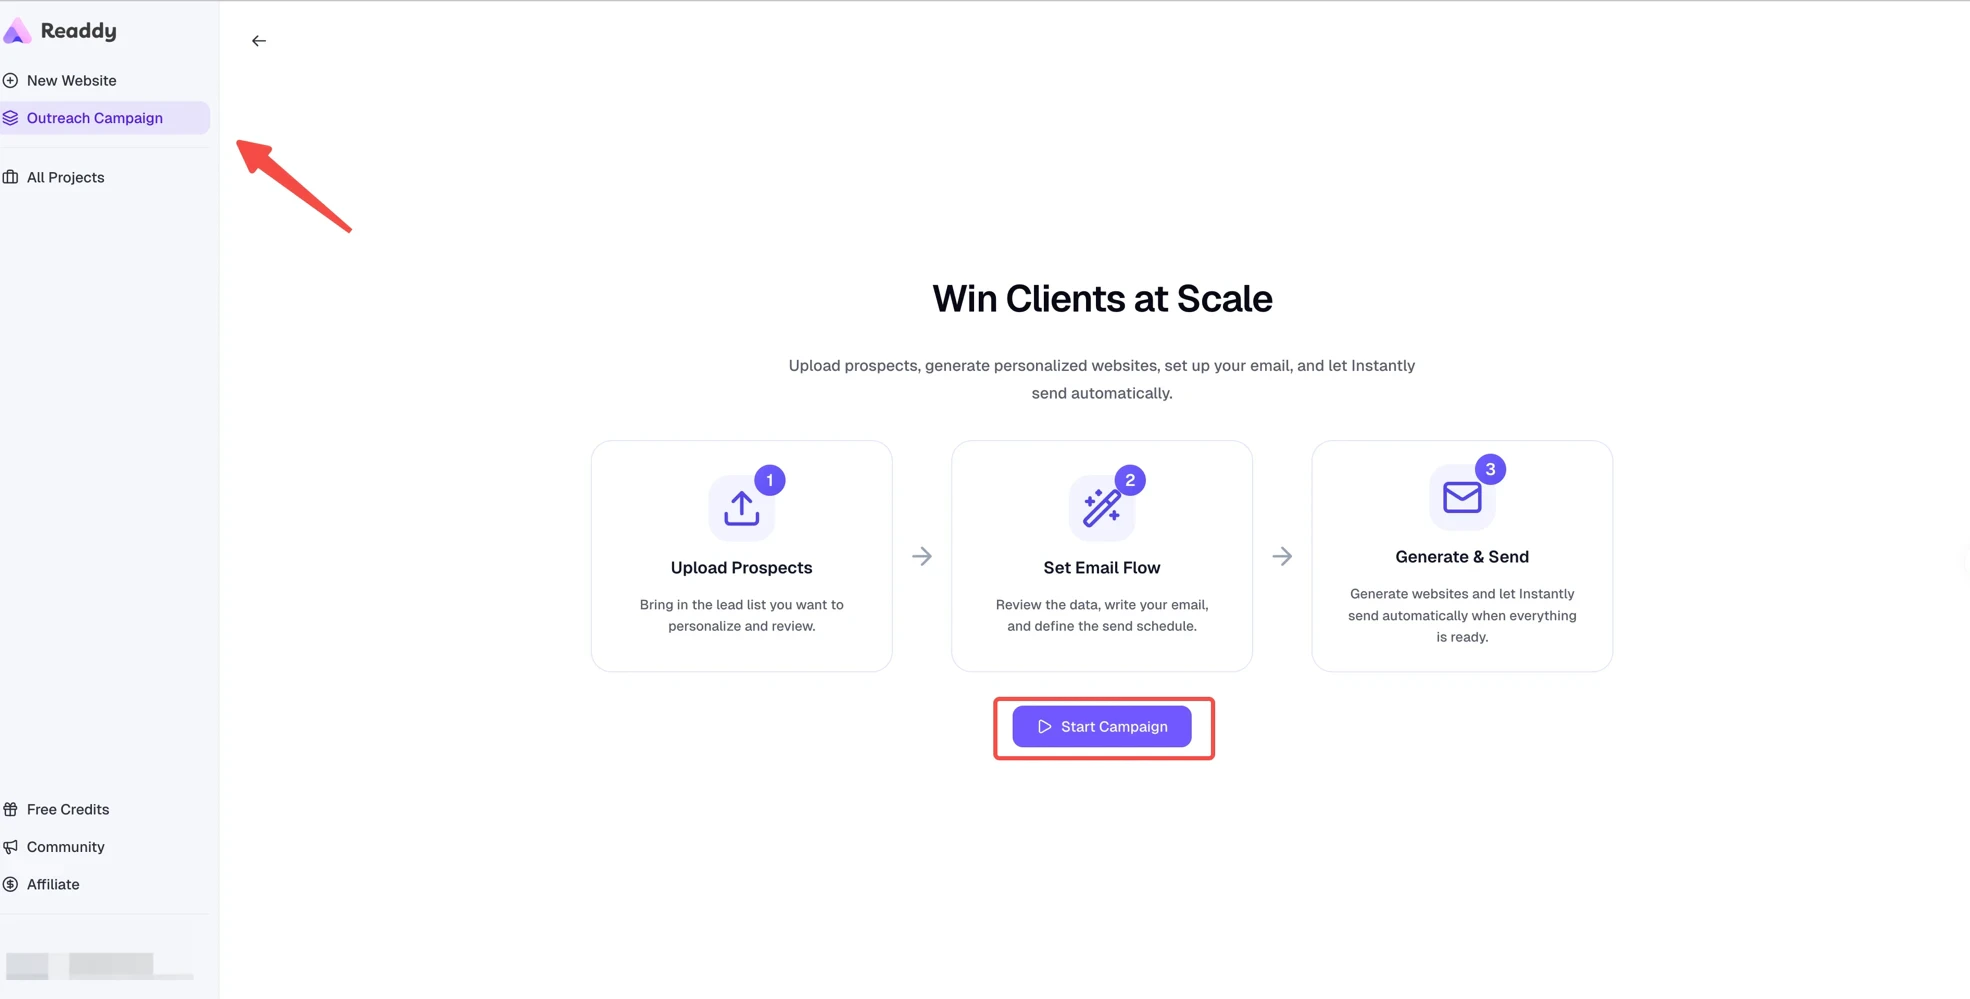
In Readdy’s current workflow, you first upload and review prospects, then complete Email Setting (content, schedule, Instantly, and mailbox selection). Website generation starts only after that setup is confirmed.Step 2: Open Outreach Campaign and Start
Go to the Outreach Campaign page
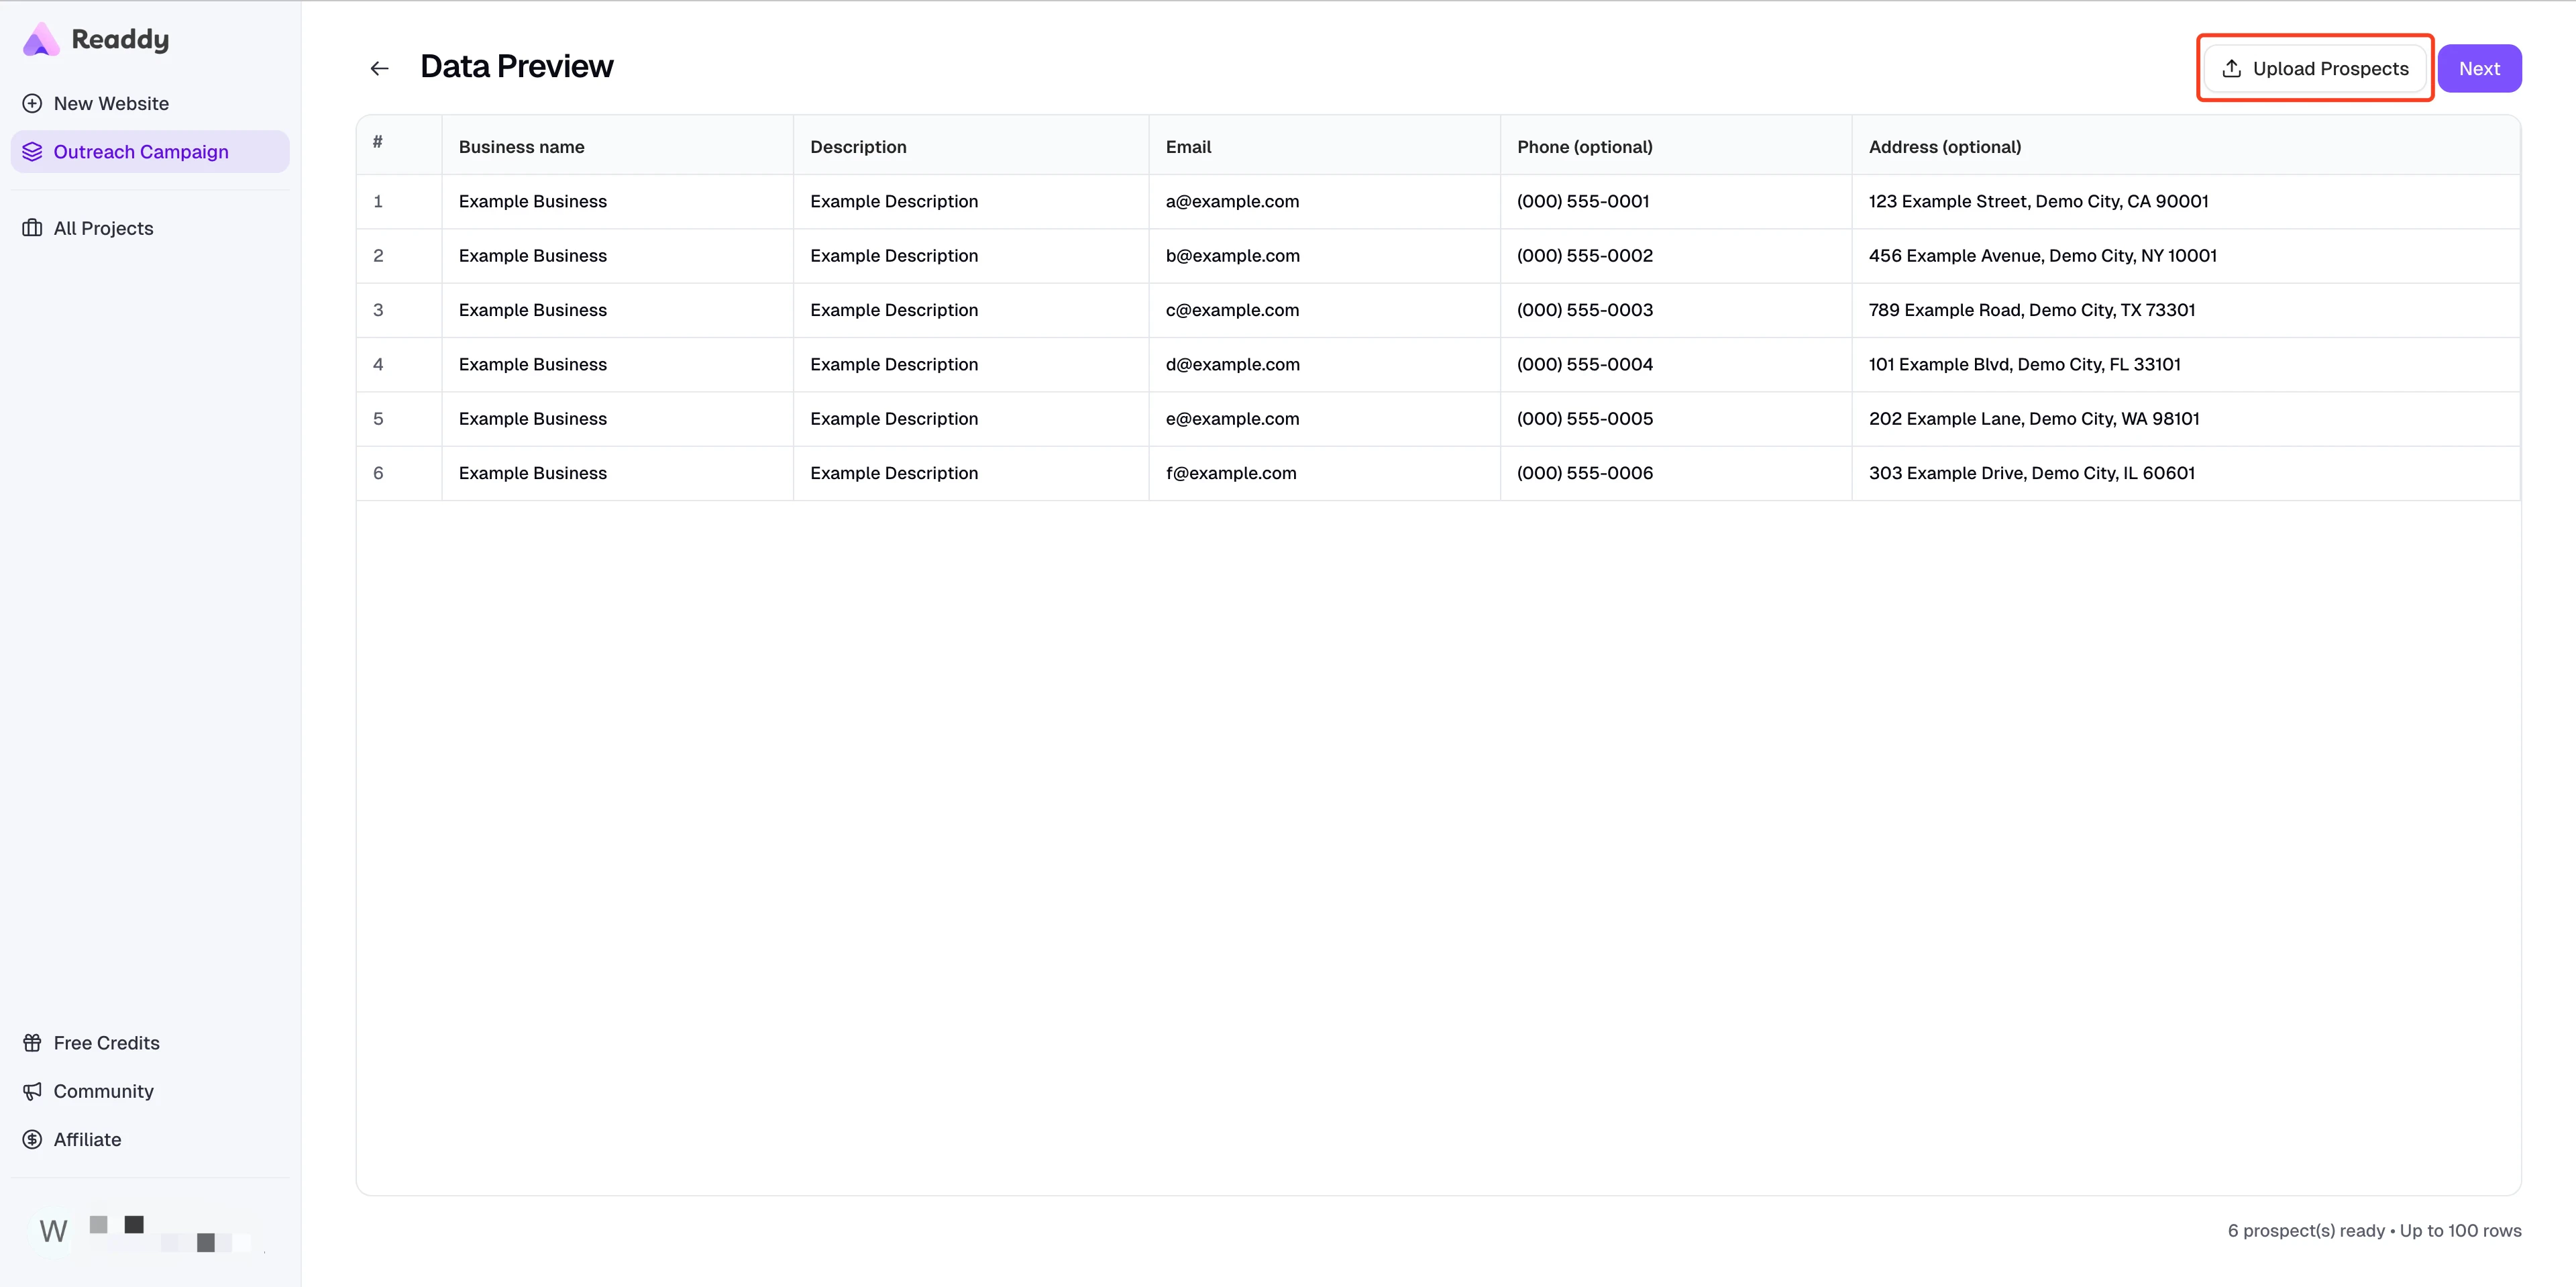
Step 3: Upload Prospects, Review Data, and Continue
After clicking “Start Campaign”, you will enter the data preview page.Open the upload screen from Data Preview
Choose a .csv or .xlsx file
.csv or .xlsx file from your computer. Readdy supports files up to 5MB and validates the content after you choose the file.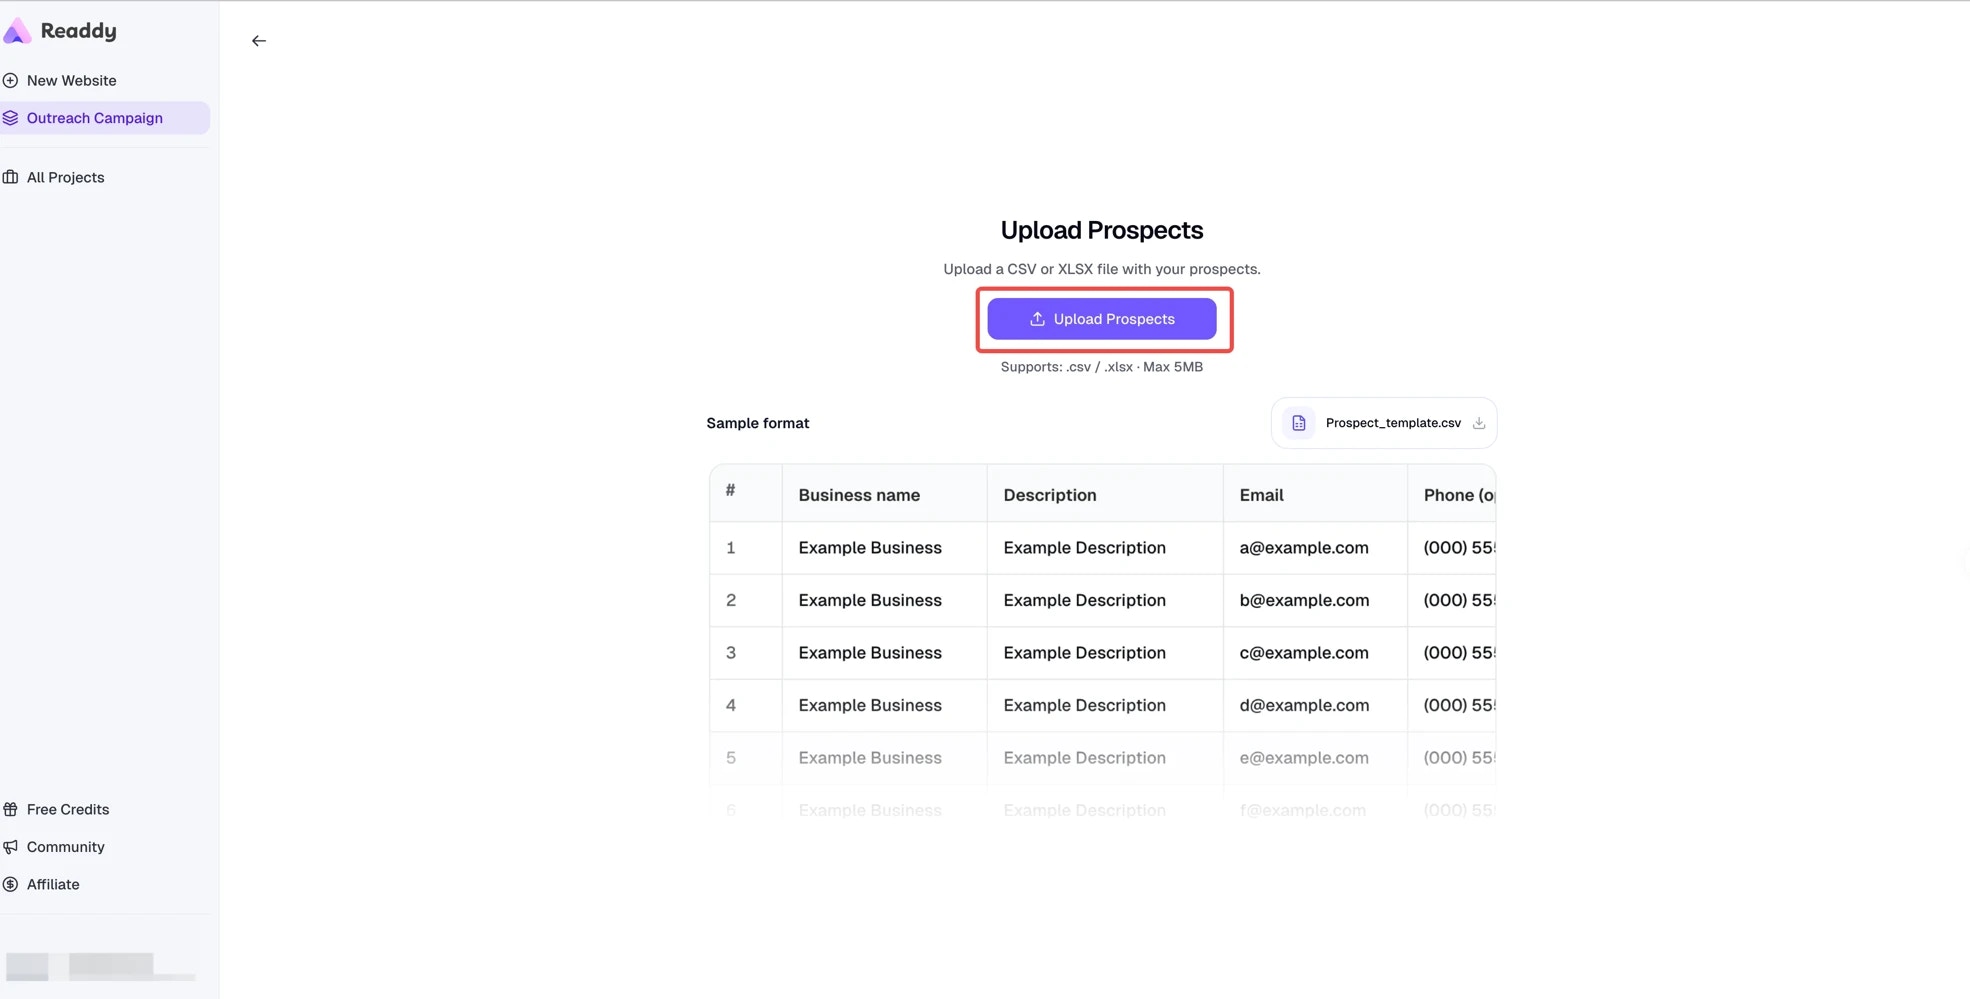
Review and edit the table
Step 4: Write Email Content
From Preview, click “Next” to open Email Setting. If you’re returning to an existing task later, use the email button in the top right of the Progress page to jump back into Start Send or Email Analysis.Write the email body
Insert variables (optional)
{{variable_name}} format. For Outreach Campaigns, Readdy also prepares {{Website_URL}} so you can include each generated website link.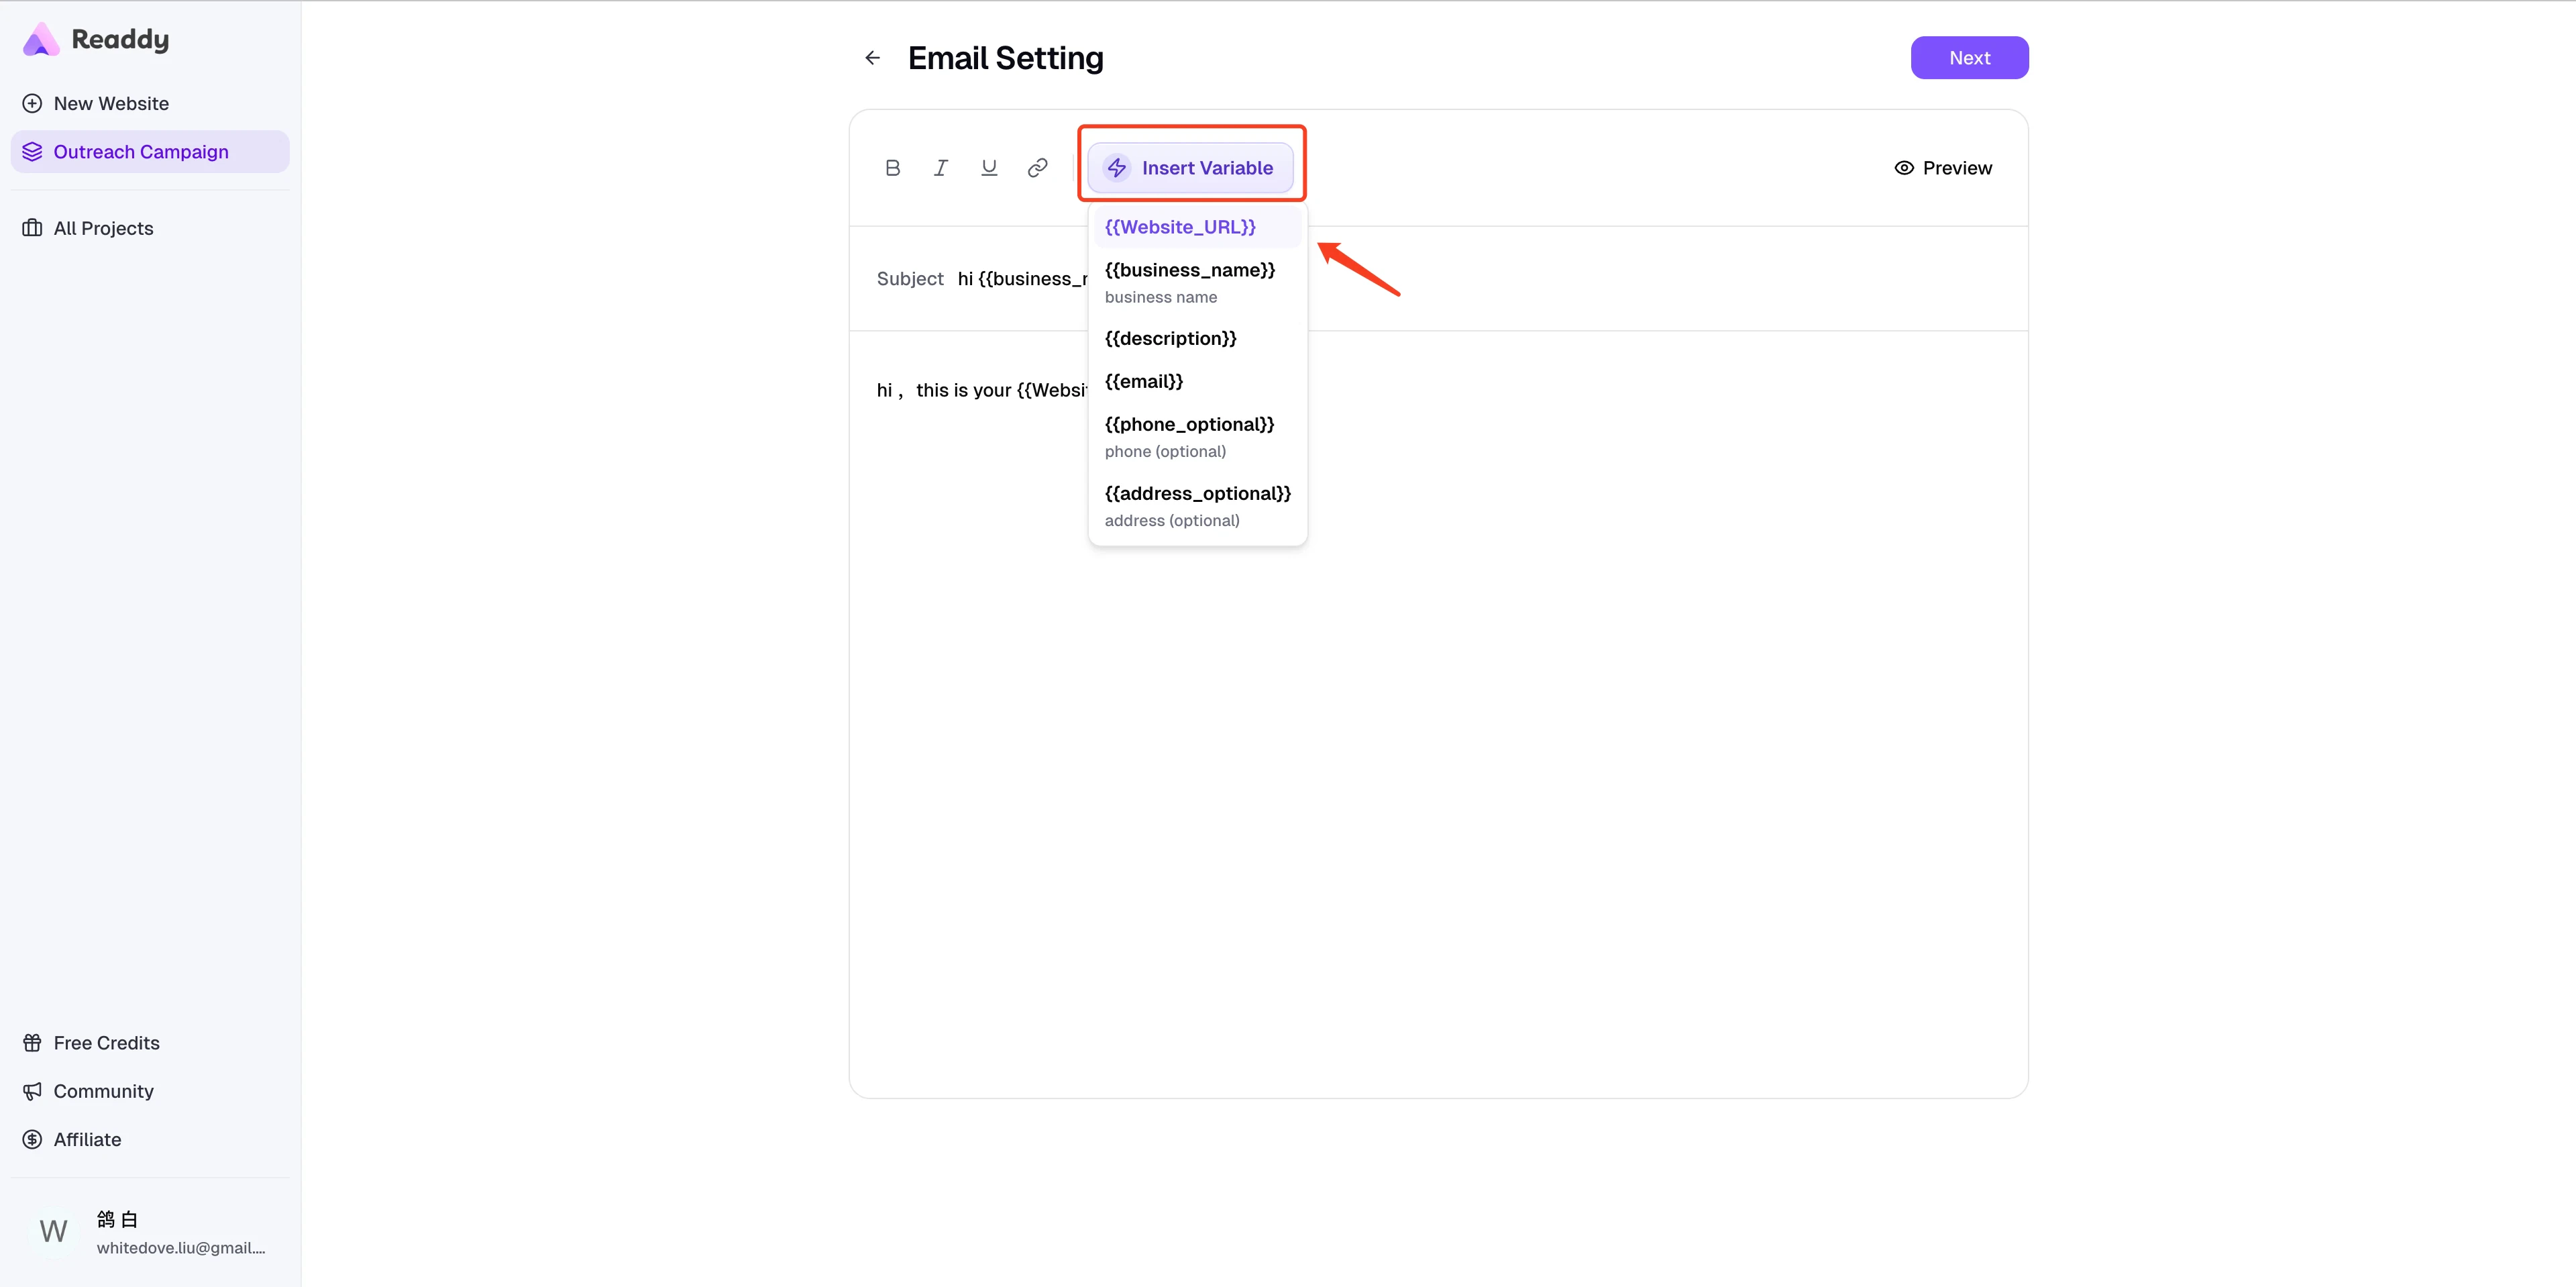
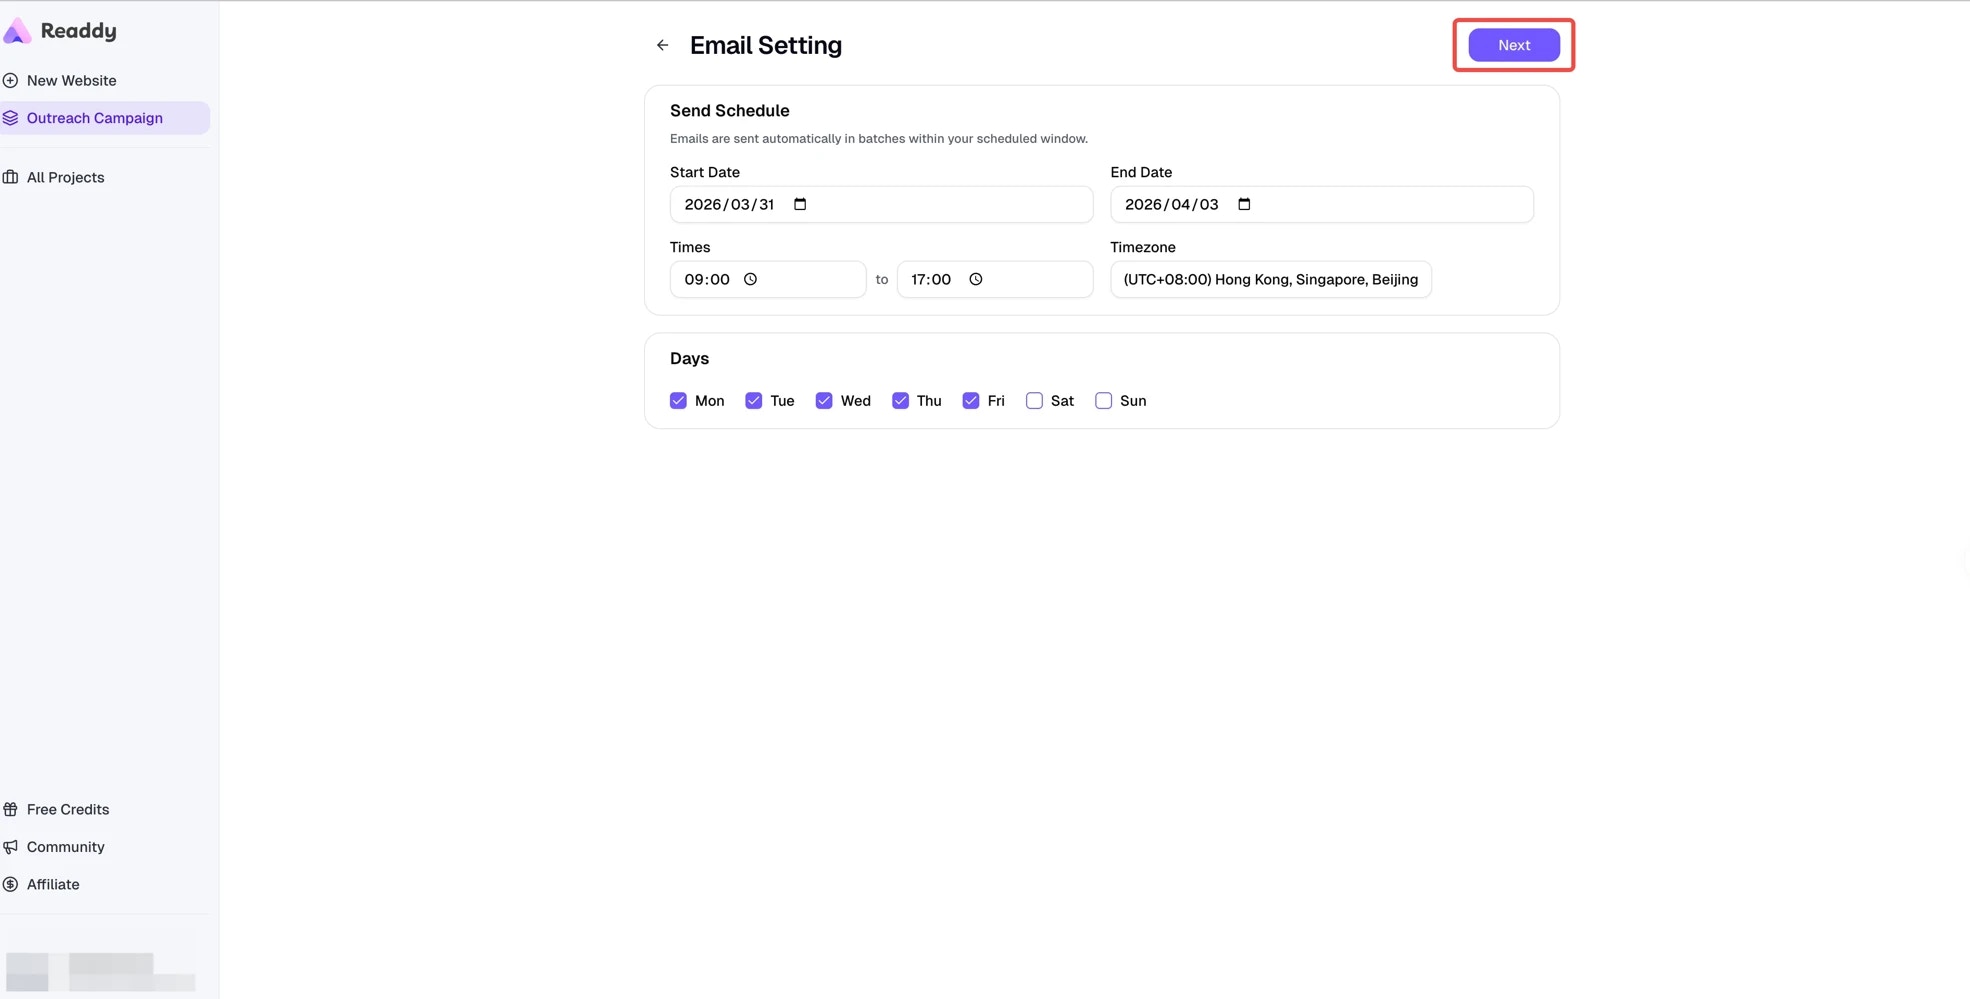
Step 5: Set Up Sending Schedule
Set date range
- Start date: When to begin sending emails
- End date: When all emails should be sent by
Set sending time window
Choose sending days
Step 6: Connect Instantly and Select Email Accounts
Connect Instantly only if needed
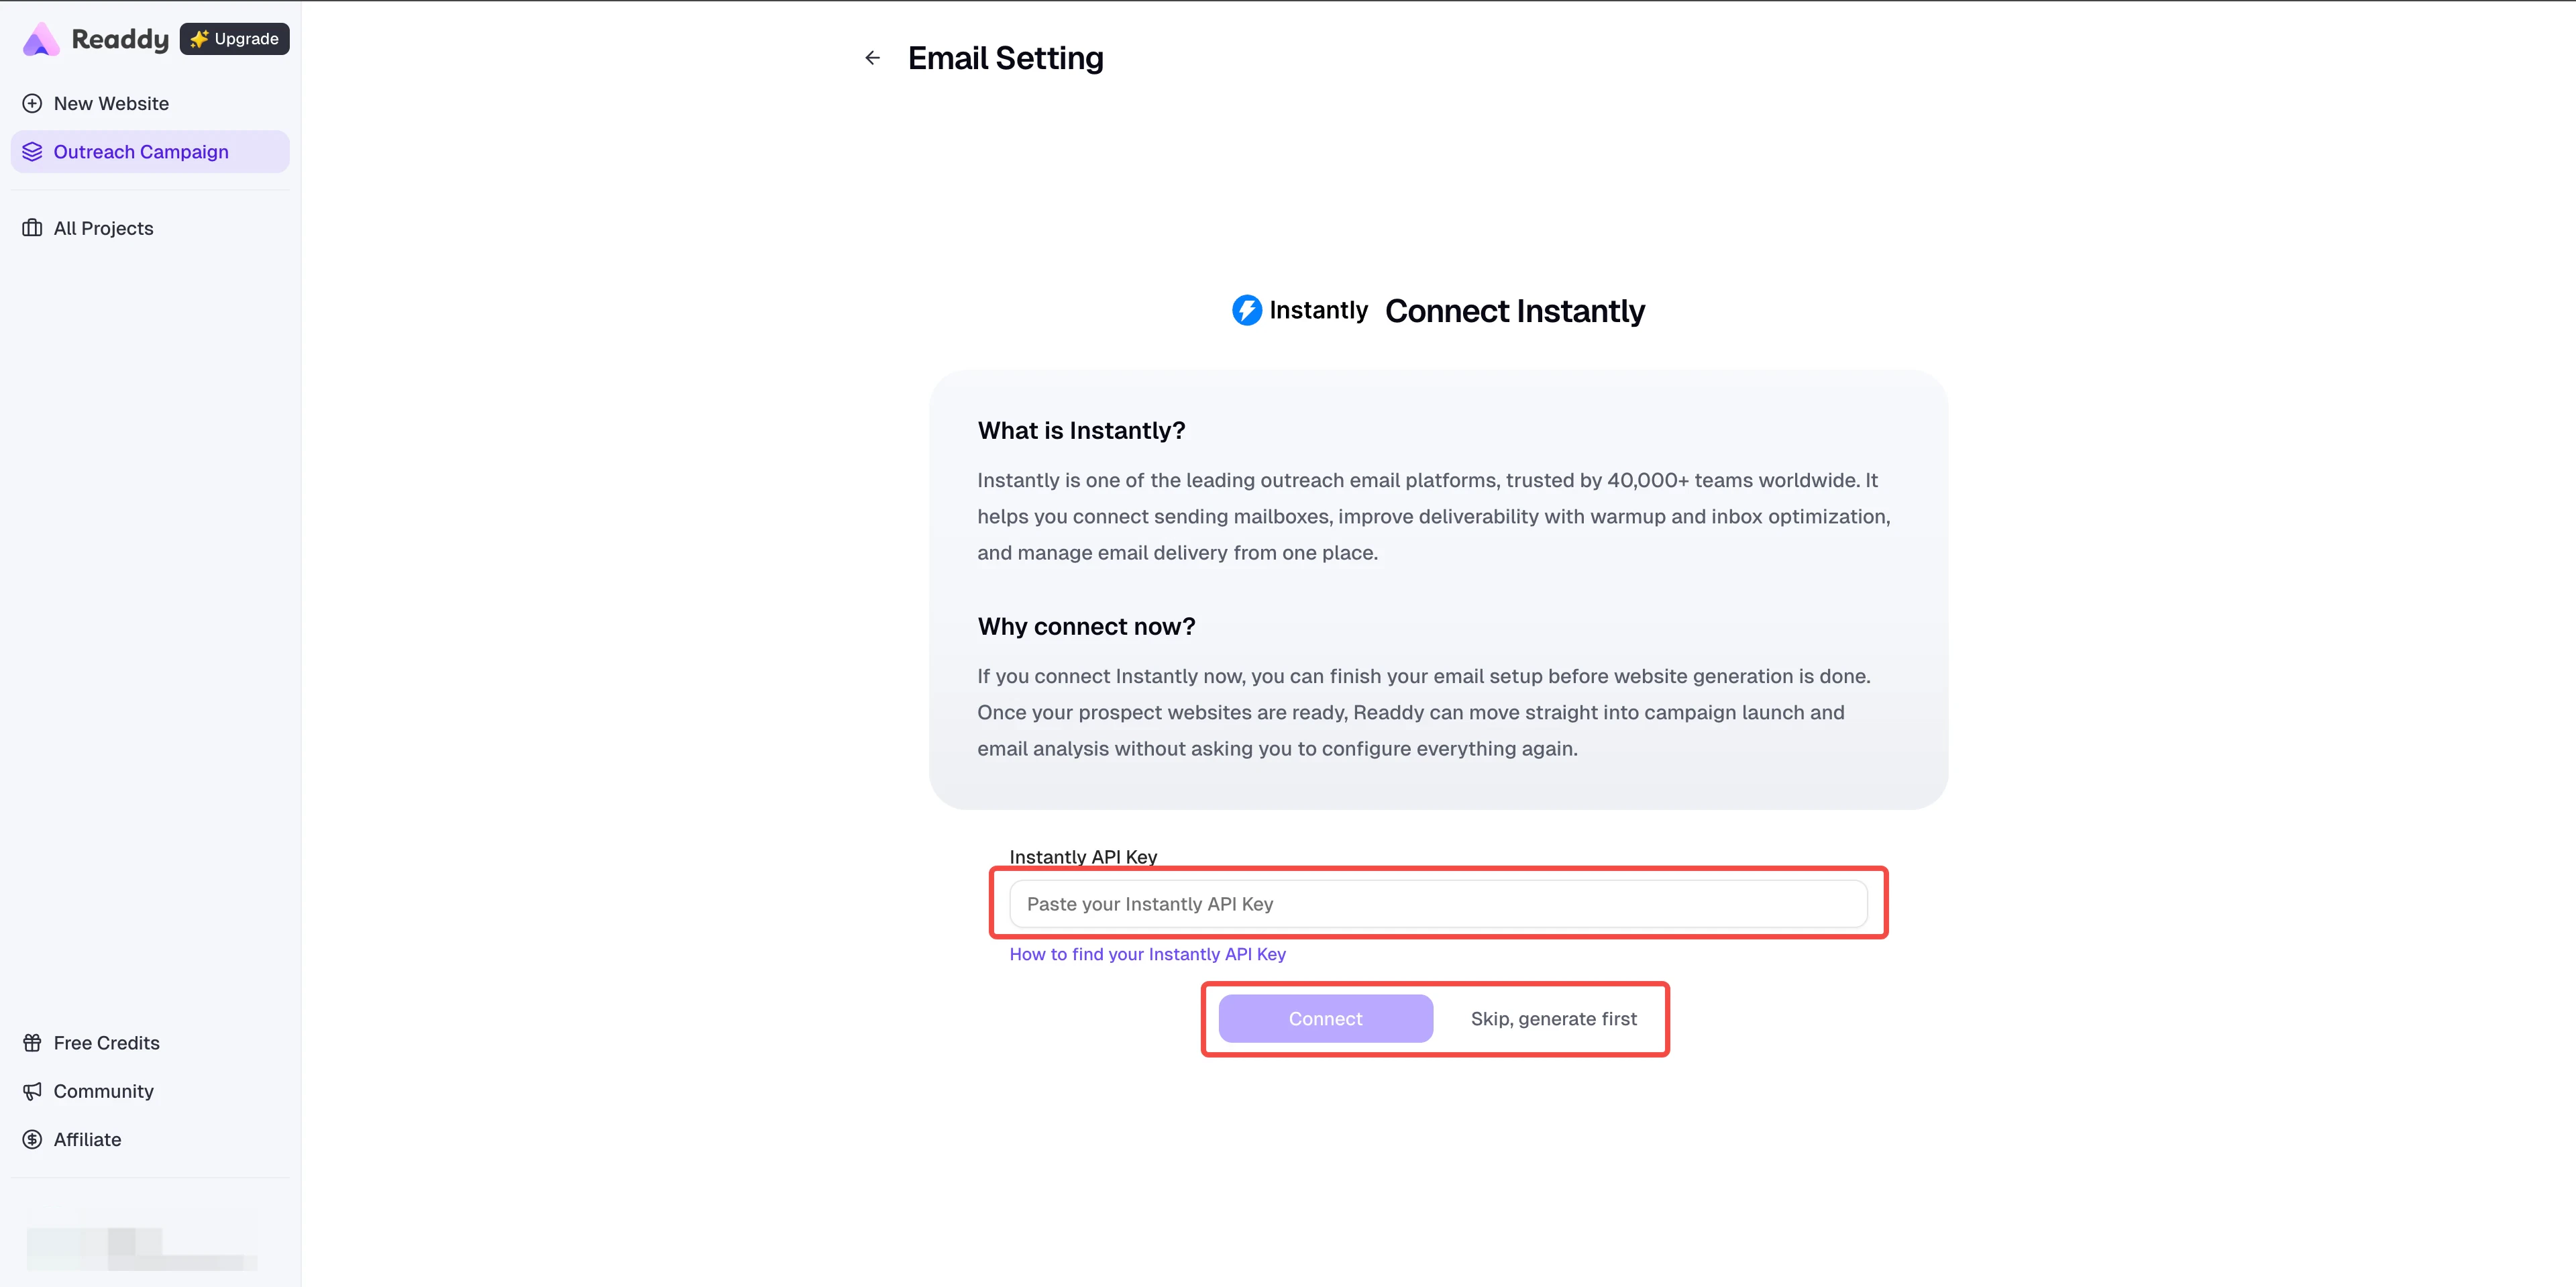
Connect now
Optional: use 'Skip, generate first'
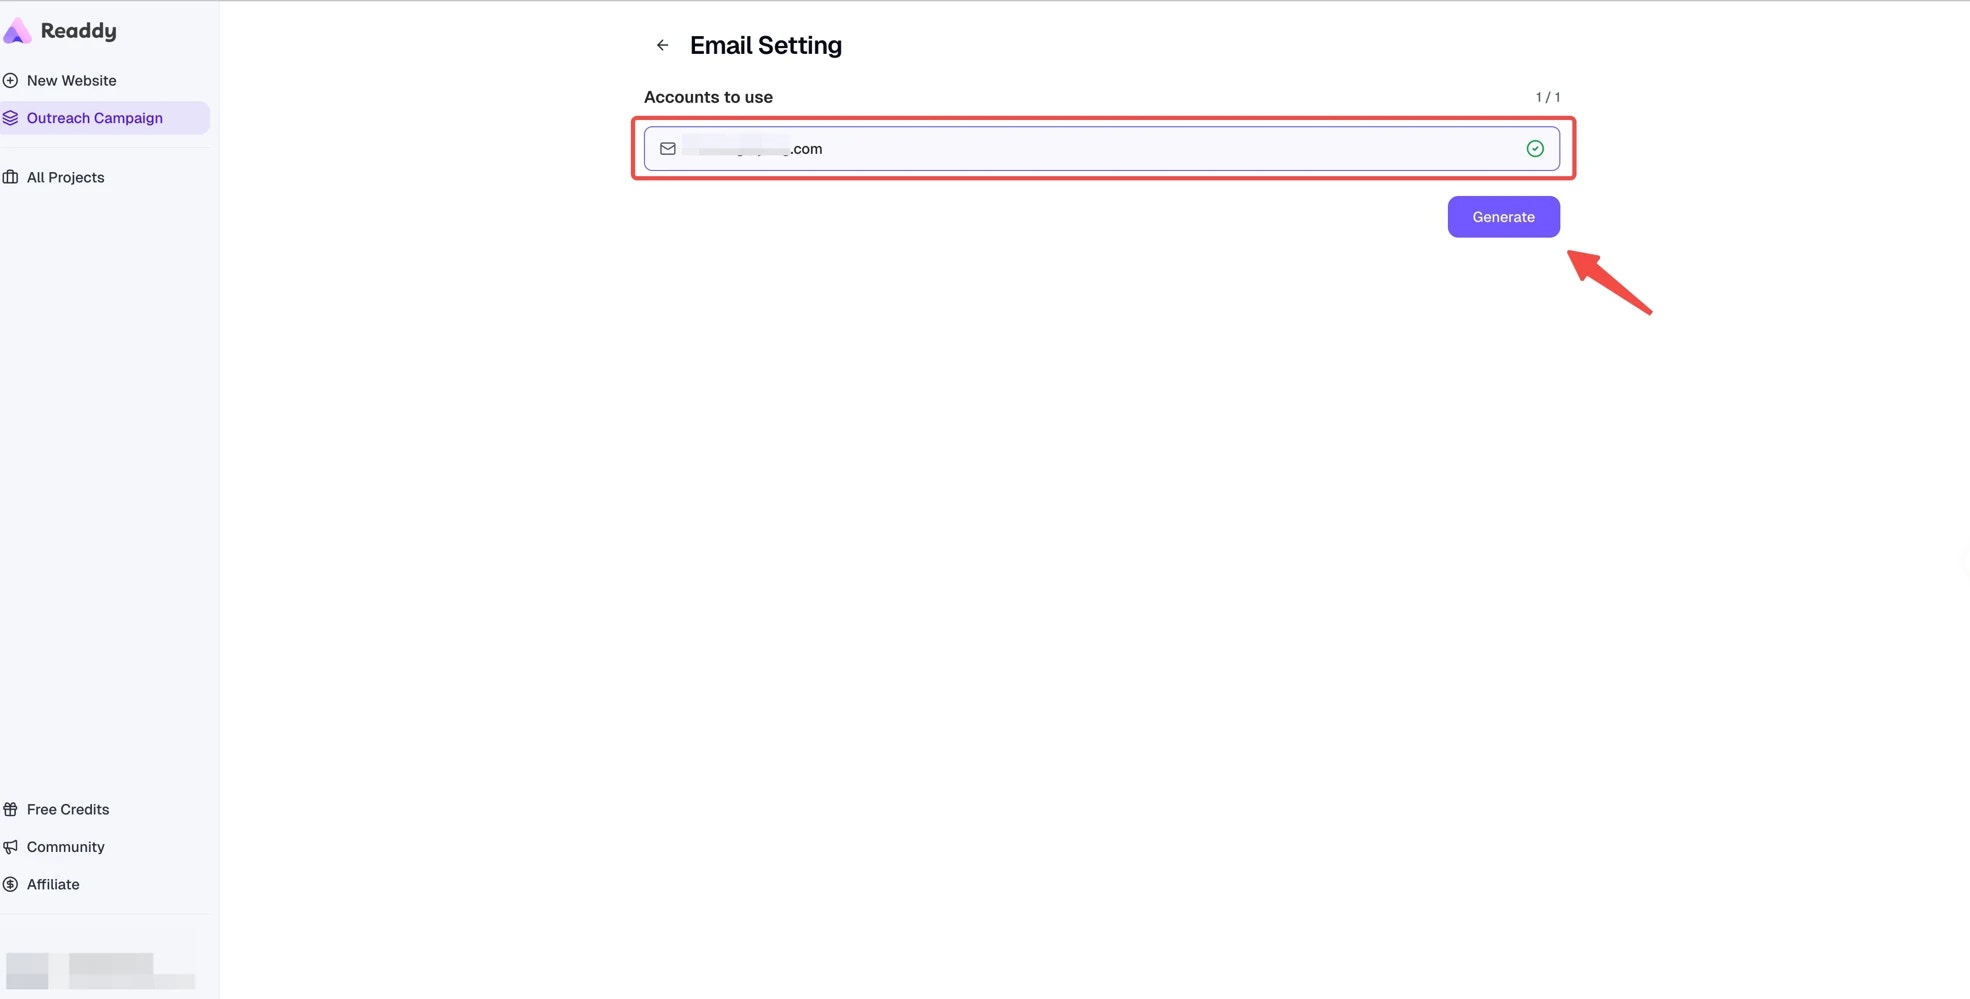
Step 7: Confirm Email Setup and Start the Campaign
This is the point where website generation begins. Readdy does not start generating right after upload; it starts after the Email Setting flow is confirmed.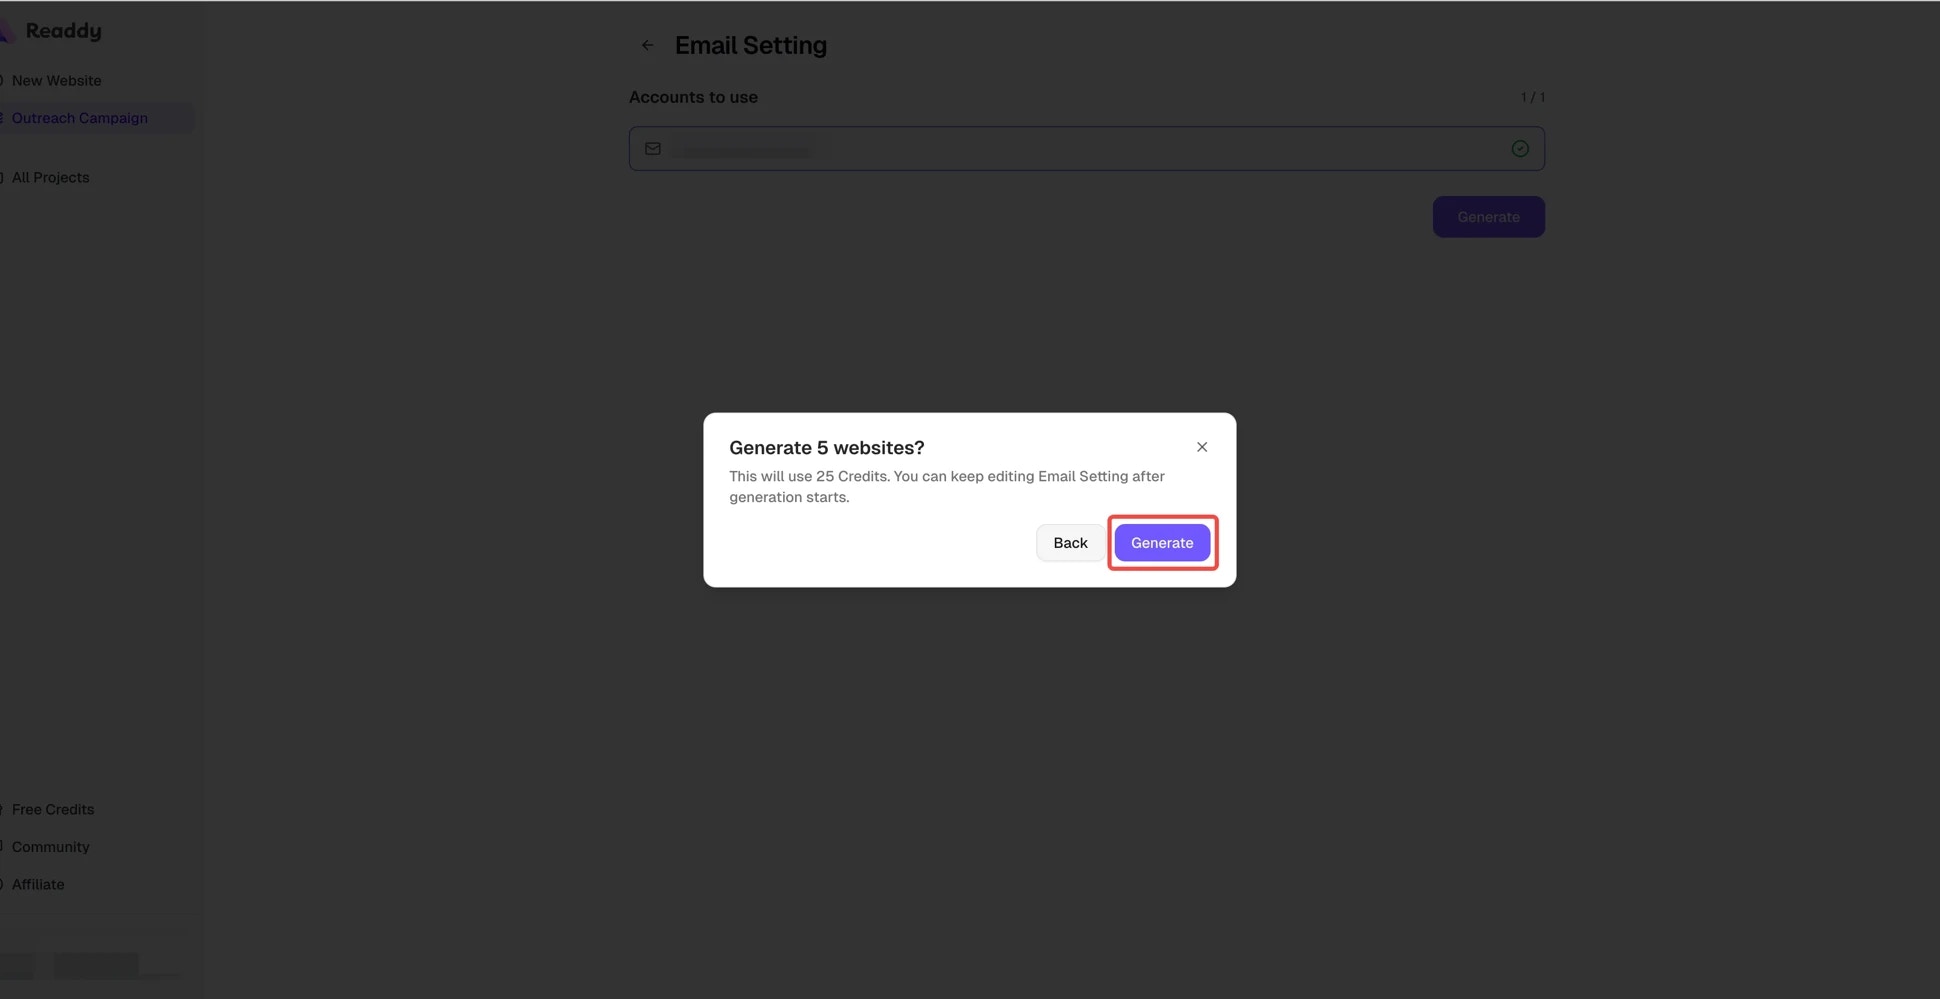
Step 8: Track Website Generation
After Email Setting is confirmed, Readdy will automatically generate websites row by row. Each row goes through these stages:| Stage | Description |
|---|---|
| Waiting | In queue, not started yet |
| Creating | Creating the project |
| Generating | Using AI to generate website content |
| Getting Link | Generating the website’s share link |
| Success | Website generation is complete |
| Failed | Something went wrong (can retry) |
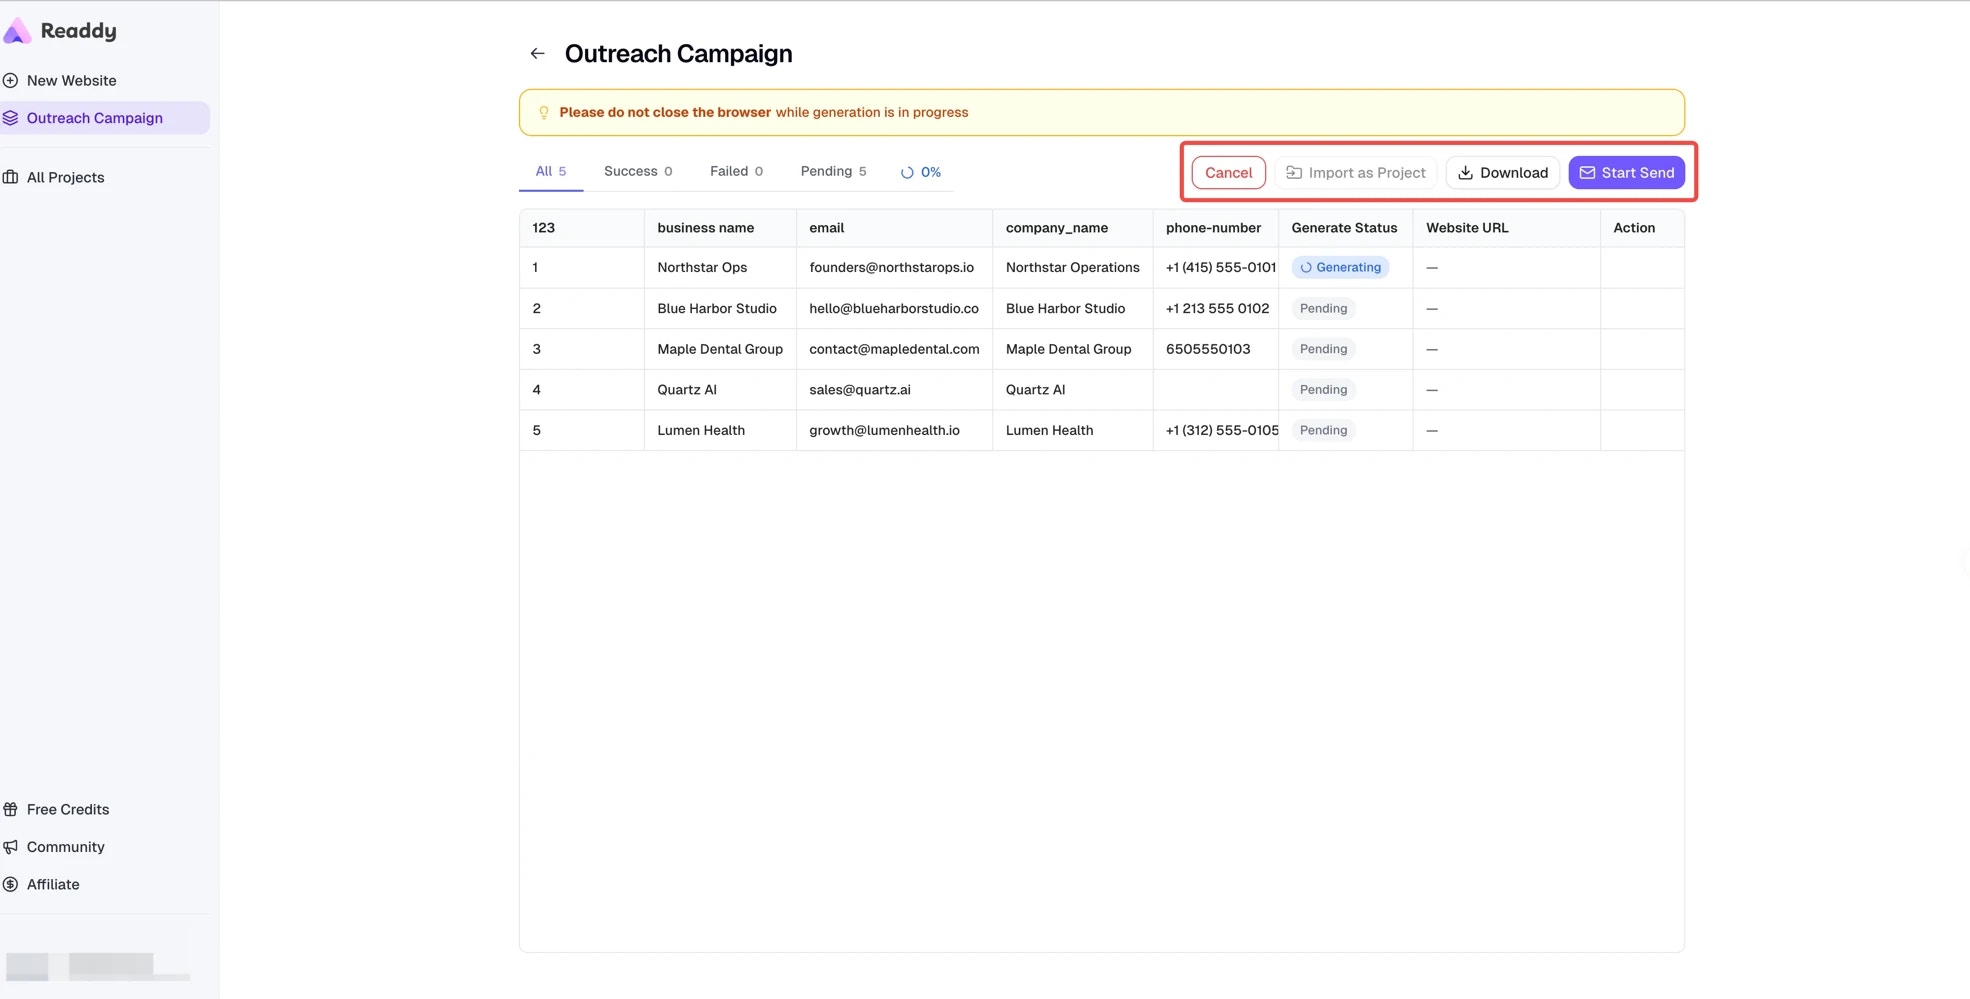
- Click “Cancel” to pause generation (already successful rows are not affected)
- Use the filter buttons at the top (All / Success / Failed / Pending) to view rows by status
Step 9: Review Website Results and Email Status
After generation is complete, campaigns that already finished Instantly connection and mailbox selection will move into email sending automatically. On this page, you can perform the following operations:| Action | Description |
|---|---|
| Copy Links | Use the copy button next to each website URL to copy the share link |
| Import as Project | Select successful rows, click “Import as Project” to add them to your project list for further editing |
| Start Send / Email Analysis | If you used “Skip, generate first”, use the email button to finish Start Send. Otherwise, once sending begins automatically, the same button opens campaign analytics |
| Download Results | Click “Download” to export results as a CSV file |
| Retry Failed Rows | Click “Retry” on failed rows to regenerate |
| Continue Generation | If a task pauses before all rows finish, click “Continue” to resume |

Step 10: View Email Analytics
After sending starts automatically, the email button on the Progress page becomes “Email Analysis”, where you can check campaign performance: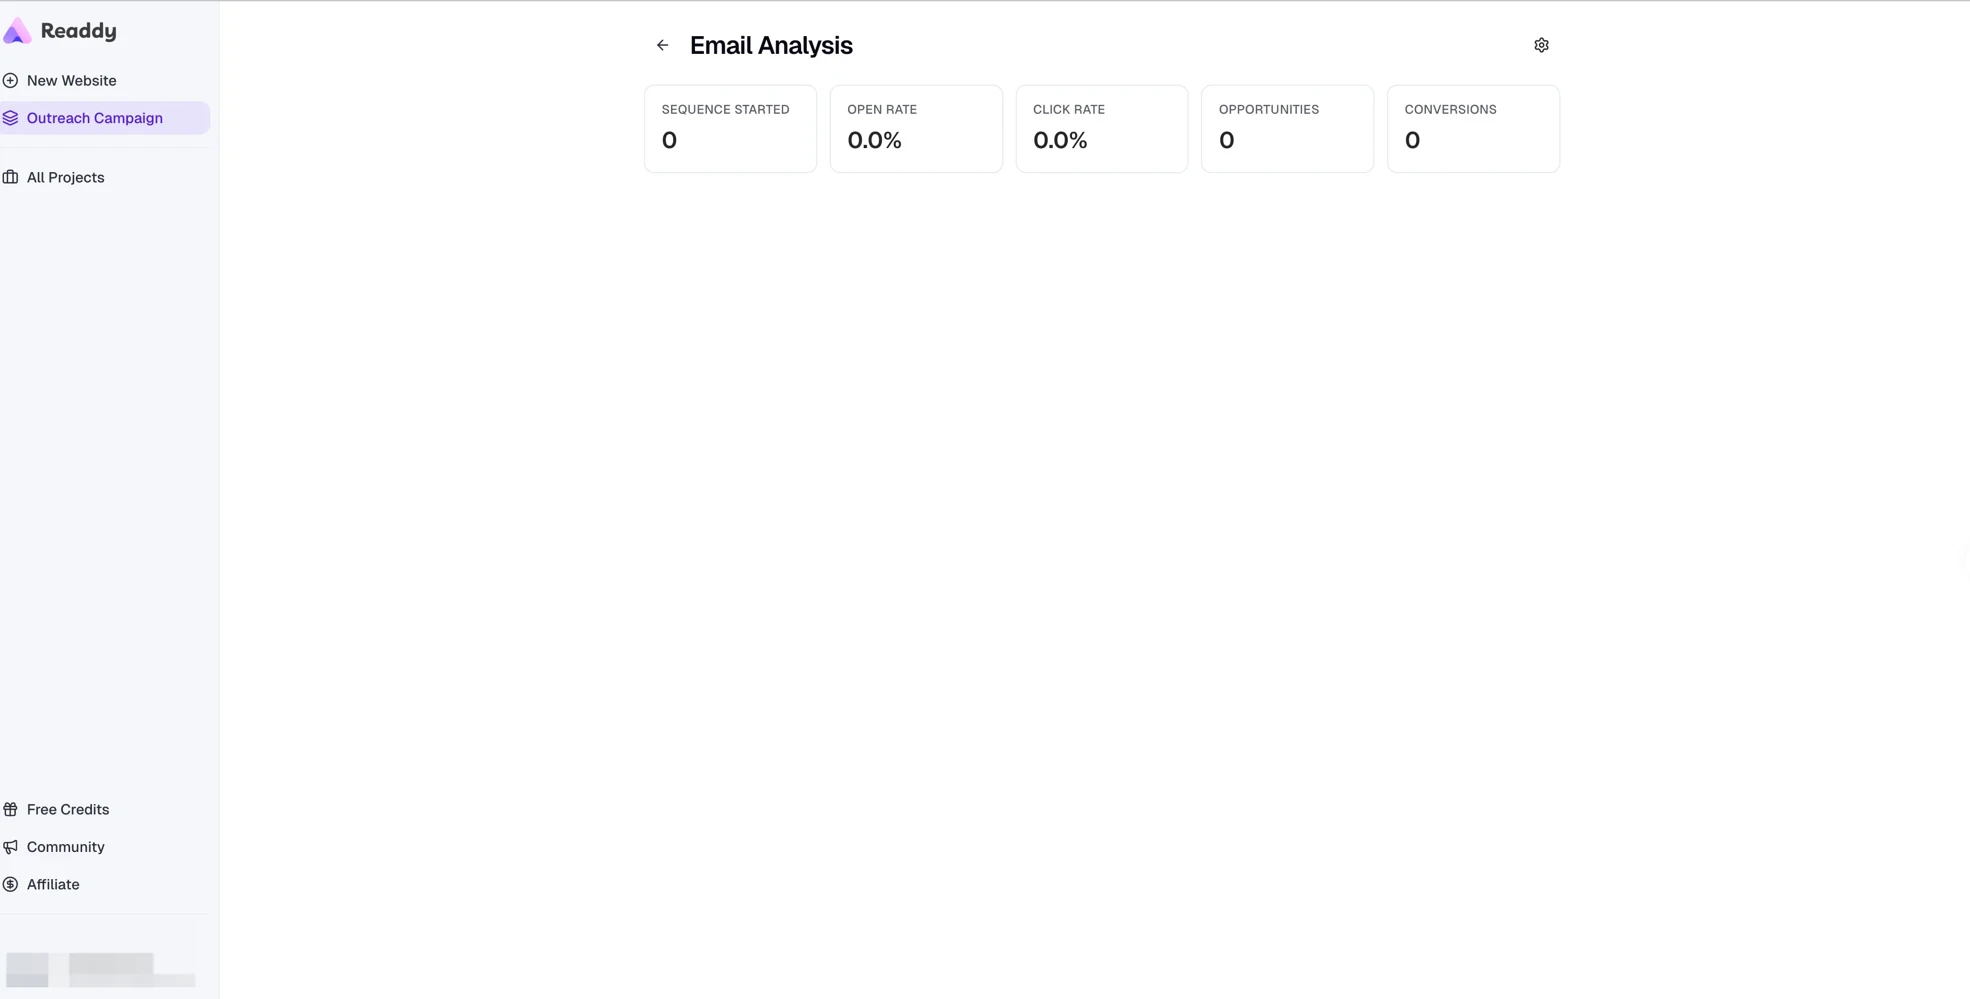
| Metric | Description |
|---|---|
| Sequences Started | Number of emails that have started the sending flow |
| Open Rate | Percentage of recipients who opened the email |
| Click Rate | Percentage of recipients who clicked links in the email |
| Opportunities | Number of interested recipients |
| Conversions | Number of final deals or completed goals |
- Pause: Temporarily stop sending
- Resume: Continue sending a paused campaign
- Delete: Permanently delete the campaign (cannot be undone!)
Limits Summary
Batch Generation Limits
| Limit | Details |
|---|---|
| Spreadsheet format | .csv and .xlsx formats are supported |
| File size | Maximum 5MB |
| Data rows | Maximum 100 rows (excluding header) |
| Required column | Must include email column |
| Email format | Each email must contain @ and be valid |
| Credits cost | 5 Credits per row, only successful rows are charged |
| Browser requirement | Browser must stay open during generation |
| Tab limit | Only one tab can run batch generation at a time |
| Plan availability | Available on the Free plan |
Cold Email Limits
| Limit | Details |
|---|---|
| Prerequisite | You can prepare Email Setting before connecting Instantly, but sending requires at least 1 active Instantly mailbox |
| Email requirement | At least 1 active Instantly mailbox must be selected manually |
| Data requirement | Must include email column, no empty emails |
| Email content | Subject and body are required |
| Campaign editing | Active campaigns must be paused before editing |
| Deletion | Deleting a campaign cannot be undone |
FAQ
File upload says 'File must contain an email column'?
File upload says 'File must contain an email column'?
.csv or .xlsx file includes an email column. Note:- Column names should not have extra spaces
- Case does not matter (
Email,EMAIL,emailall work) - We recommend downloading our template file and following its format
File upload says 'Invalid email format'?
File upload says 'Invalid email format'?
- Be missing the
@symbol - Have extra spaces
- Be incomplete (e.g., only
abc@without a domain)
Accidentally closed the browser during generation?
Accidentally closed the browser during generation?
Shows 'Batch generation is running in another tab'?
Shows 'Batch generation is running in another tab'?
'Invalid API Key' when connecting Instantly?
'Invalid API Key' when connecting Instantly?
- Make sure you copied the complete API Key without extra spaces
- Confirm the API Key is from Instantly dashboard: Settings - Integrations - API
- Confirm your Instantly subscription plan supports API access
- If it still doesn’t work, try regenerating a new API Key in the Instantly dashboard
Can I start generation before connecting Instantly?
Can I start generation before connecting Instantly?
How to check Cold Email campaign performance?
How to check Cold Email campaign performance?
- Open rate: How many people opened your email
- Click rate: How many people clicked links in the email
- Opportunities and Conversions: How many people replied or had further interactions
How many emails per mailbox per day is recommended?
How many emails per mailbox per day is recommended?
How to update or change the Instantly API Key?
How to update or change the Instantly API Key?
Need Help?
If this guide doesn’t resolve your issue:- Submit a support ticket: readdy.ai/feedback
- Live chat: Use the live chat in the top-right corner of Readdy